Transforming Our Kitchen Nook: A DIY Journey to an English Countryside Cottage
14.05.24
Discover how I transformed our plain kitchen nook into a cozy, English countryside-inspired space in today’s DIY blog post!
Nancy Meyers Inspired Kitchen Nook
Introduction
There’s something magical about creating a space in your home that feels like a true reflection of your heart and soul. For me, that inspiration comes from the quaint charm of the English countryside—particularly the picturesque Cotswolds. With its beautiful landscapes and cozy interiors, it’s exactly what I envisioned for our kitchen nook transformation. This DIY project was driven by my passion to bring that sense of home and cosiness into every corner of our space, starting here.

Inspiration & Planning: Where I Find Design Inspiration
As with most home projects, my journey began on Pinterest, where I dove into the endless pool of design possibilities. From colour schemes to textures, Pinterest has been my go-to for clarifying what I love and filtering out what I don’t. Each pin helped steer my vision towards creating content that would hopefully inspire others to break away from the “neutral norm” and embrace colour, texture, and personality in their homes.

The planning phase involved a mix of digital tools and intuitive choices. While I usually love to layout my projects in Canva, playing interior designer for a day, this project required a simpler approach. The focus was on picking the right materials, measurements and colours. After bringing home a variety of paint samples from Sherwin Williams, it was a gut decision that led us to the perfect hue—capturing the essence of our dreamy, yet functional space.
I always recommend moving your paint chit or sample around the space to see it in different light settings. And even to have it up for a full day to see how it changes in your space as the morning to evening light shifts!
Materials & Tools Needed
Let’s get you prepared for your own project! To bring this vision to life, I gathered a comprehensive set of tools and materials, meticulously chosen for their quality and functionality. Here’s the complete list:
Power Tools:
- Brad Nailer
- Table Saw (Kindly supplied by RONA+ for a collaborartion)
- Mitre Saw
- Jigsaw (for those intricate cuts)
- Circular Saw
- Hand Sander + Sandpaper
Materials:
- Pencil
- Speed Square
- Measuring Tape
- Laser Level + Tripod
- Safety Glasses + Dust Mask (vital for safety — I wish I had, had a dust mask sooner!)
- MDP ShipLap Painted Panels, 1/2-in x 5.5-in x 8-ft (I bought around 35 boards and inspected each one before loading it onto my cart — hot tip, these could be damaged in store so be sure to choose them the same way you would when grocery shopping for produce!)
- Finger Joints (two types: flat for top, curved for bottom)
- 1 3/4” Brad Nails (before purchasing make sure they match the gauge of your Brad nailer i.e. 18 gauge) Combo pack Brad nails
- 1” Finishing Brad Nails
- No More Nails Construction Glue
- DAP Alex Plus
- Caulking Gun
- LePage 15 min Speed Dry Poly Filler (I love this stuff! And in this tube makes it super easy to use)
- Scrapers (Good to have on hand for many projectst)
- Sanding Block
- Paint Tape (I like this thickness especially when I’m using a roller)
- 13mm Roller (Learn more about choosing paint products here – I get all of my paint supplies from Sherwin Williams and always just ask extra questions to the staff there!)
- Paint Roller
- Paint Dish + Plastic Protectors
- Paintbrush
- Paint Brush Handle Extender
- Paint – Sherwin Williams Excellence Range in Atmospheric
- New Flush Decor Light Switch Mount (It’s nice to have the one with no holes visible for that clean upscale look)
Each tool and material was selected from RONA and RONA+, except for the paint, which came from Sherwin Williams’ Excellence range (I try my best to always choose this one), known for its high durability in high-traffic spaces and a satin finish perfect for our needs! It’s also really easy to work with and has great application and coverage.


Step-by-Step Guide
Embarking on this DIY project involved meticulous planning and careful execution but nothing to be afraid of! You can totally tackle this one! Here’s a detailed walkthrough of each step I took to transform our kitchen nook into a cosy, English countryside-inspired space.


Preparation and Material Collection:
- Start by measuring the space thoroughly. It’s always better to have a few extra boards on hand than to run out mid-project, so I recommend purchasing more than you think you’ll need. This also eases your mind along the way if you make a mistake. It’s okay, it’s not that deep, keep calm and carry on.
- Ensure all necessary tools and materials are within reach to keep the process flowing smoothly.
Checking Wall Alignment:
- Before you begin installing the shiplap, check if your walls are straight (this is where your laser level will come in handy!). Often, walls aren’t level, which can throw off the alignment of your decor wall. You ALWAYS want to have straight boards from the start or else you are going to run into a tricky cut at the corners.
- ATTENTION: The error here would have been matching the board perfectly to the edge of the wall. Because the wall was actually out by about 3/4″-1″ we would then run into problems down the line. This board MUST be straight or else when you flow to your corner you will realise the mistake. We (I had to FaceTime my Dad for this part) corrected this by temporarily (with 3 Brad nails) nailing the first board straight with an overhang at the corner for future cutting. Then I was able to get started on my own with the second board by gluing and nailing (we will get into that). If you are well versed in using the circular saw you can cut the first board perfectly straight and go from there as well (This is the part I needed help from my Dad on – remember you can always ask for help!).
- Use a laser level to project a perfectly level line across the wall. This will be your guide for aligning the shiplap boards.
Installing the First Board:
- Measure and cut each board to size if not perfectly 8ft using the Mitre saw, then use the laser level to ensure it’s perfectly horizontal. From there you will be good to go!
- To secure the boards apply No More Nails glue along its back and use a brad nailer with 1 3/4” nails for attachment. I would use 2 nails at the top and 2 at the bottom and if necessary two near the middle.
- ATTENTION: One thing to keep in mind is the more nails you use, the more you’ll have to fill. Find the balance between securing the boards and not overdoing it with the Brad nails. Each board of tongue and groove also holds the next. With the glue, the nails and your overall wall you should be secure!
Continuing Shiplap Installation:
- Continue attaching subsequent boards, ensuring each is level and fits snugly against the last. I would do this by sometimes slightly tapping the boards with a rubber mallet and/ or using my handheld level.
- Adjust the placement of nails depending on the wall’s surface; some areas may require more support than others.
- BEGINNERS LESSON: Adjust your brad nailer pressure to ensure nails are not protruding or driven too deeply. If a nail does stick out, gently tap it in place with a hammer and then add more pressure so you can avoid this next time. You can do this using the dial near the top of your brad nailer near the nozzle on most Brad Nail Guns.
Dealing with Corners and Obstacles:
- When you reach corners or obstacles like windows, the project may require more precise cuts and measurements. Use a combination of the miter saw, table saw, and circular saw as needed.
- The window cuts are where my Dad helped with some of the more complex cuts involving the circular saw because we required what’s called a plunge cut. If you’re not comfortable with certain tools, don’t hesitate to seek help.
- At the corners you can opt for a 90 degree finish. Or if you are looking to level up your project give a 45 degree table saw cut a try! I didn’t do this because the window on our other wall was not possible. (Every project is different! Choose whatever feels right to you!)
Applying Finishing Touches:
- Once all shiplap is installed, use DAP Alex Plus caulk (with caulking gun) to fill any gaps around windows and the board edges (I didn’t do the edges and you’ll see why in tip 8).
- Remove excess with your finger and paper towel. The process in which I do this is I apply the product along the crease, use a dish of water to moisten my finger, run my finger along the line where the product is pushing it into the crack and smoothing off the excess and then using paper towel to clean off my finger. I repeat this until the space is complete.
- For nail holes, I recommend using LePage 15 Minute Speed Dry Poly Filler for a smooth finish. I love having the smaller handheld tube for this versus out of a tub because it’s so easy to work with!
- Apply product and wipe off excess with your finger here as well (this is just much easier as there will be less to remove)
Sanding and Painting:
- Before painting, sand down the entire installation lightly with a hand sander to ensure the paint adheres properly.
- Even though the shiplap boards are pre-primed and come in white they seem to have a coating on them that can prove to be very tricky for paint to stick to. I would recommend using a hand sander to sand down your project before applying your first coat.
- On a previous project I did not do this step and I found the paint to collect in little beads on the boards. Don’t miss this step for an easier paint job after the fact. You won’t regret it!
- On this step before I start painting I will also cut my trim pieces. I used a finger joint at the top of the wall and a curved joint at the bottom.
- I found for me measuring and cutting these ahead of time because they required angled cuts allowed me to focus on the construction first and the painting second.
- I also painted these joints off the wall prior to attaching them. I did this because it ensures the perfect finish. But remember they will need 2 coats just like the rest and may have multiple sides exposed!
- Tape up your area and dust off excess particulate matter created from your sanding step.
- Paint the shiplap with a brush for edges and creases and a roller for broad surfaces. I applied two coats of Sherwin Williams paint in Atmospheric to achieve a durable, satin finish.


Adding Trim and Final Details:
- Cut trim pieces to size, paying close attention to angles and lengths (ahead of painting as previously stated) using your Mitre Saw. Fit these after painting the walls but before the final coat to ensure they blend seamlessly.
- Secure trim pieces with 1” finishing nails. Once again for that perfect finish fill any resulting holes with the LePage poly filler and touch up with paint for a flawless finish.
- BEST AMAZON PURCHASE: I found these on Amazon and they are PERFECTION for quickly fixing any small paint chips your wall will get over time and even in this situation for a spot as small as a nail hole. I now have these for every room and have them labelled so if something happens I can quickly touch the wall up! No fuss no muss and they claim to last 7 years.
Reassembling and Cleaning Up:
- Reattach any removed fixtures, such as light switch covers!
- Step back and enjoy your newly transformed space. Consider this a perfect opportunity to draw a bath and relax after all your hard work!
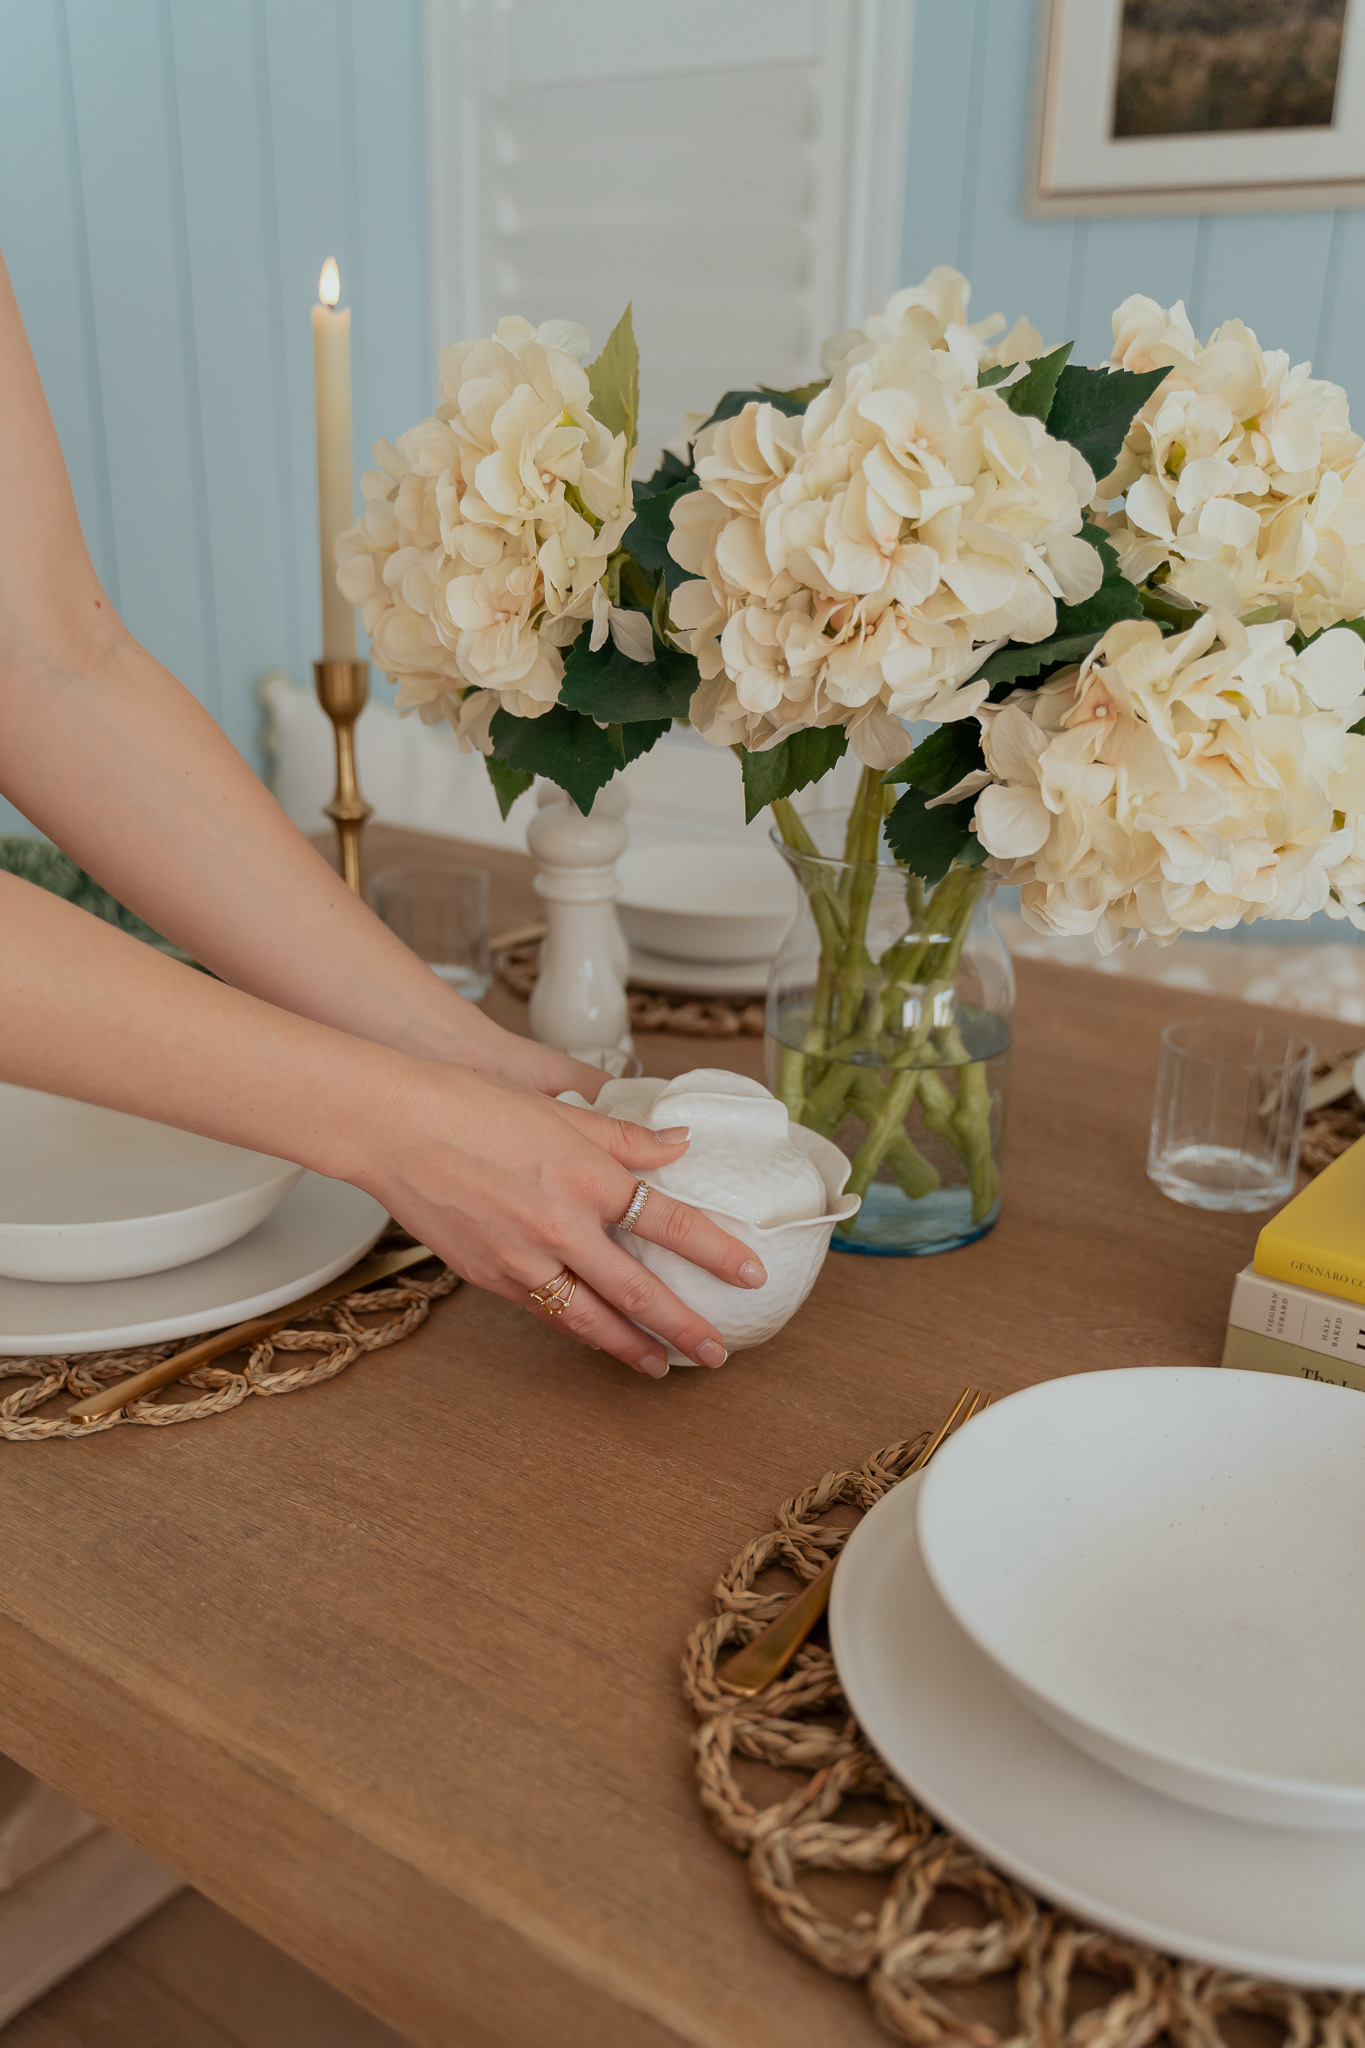
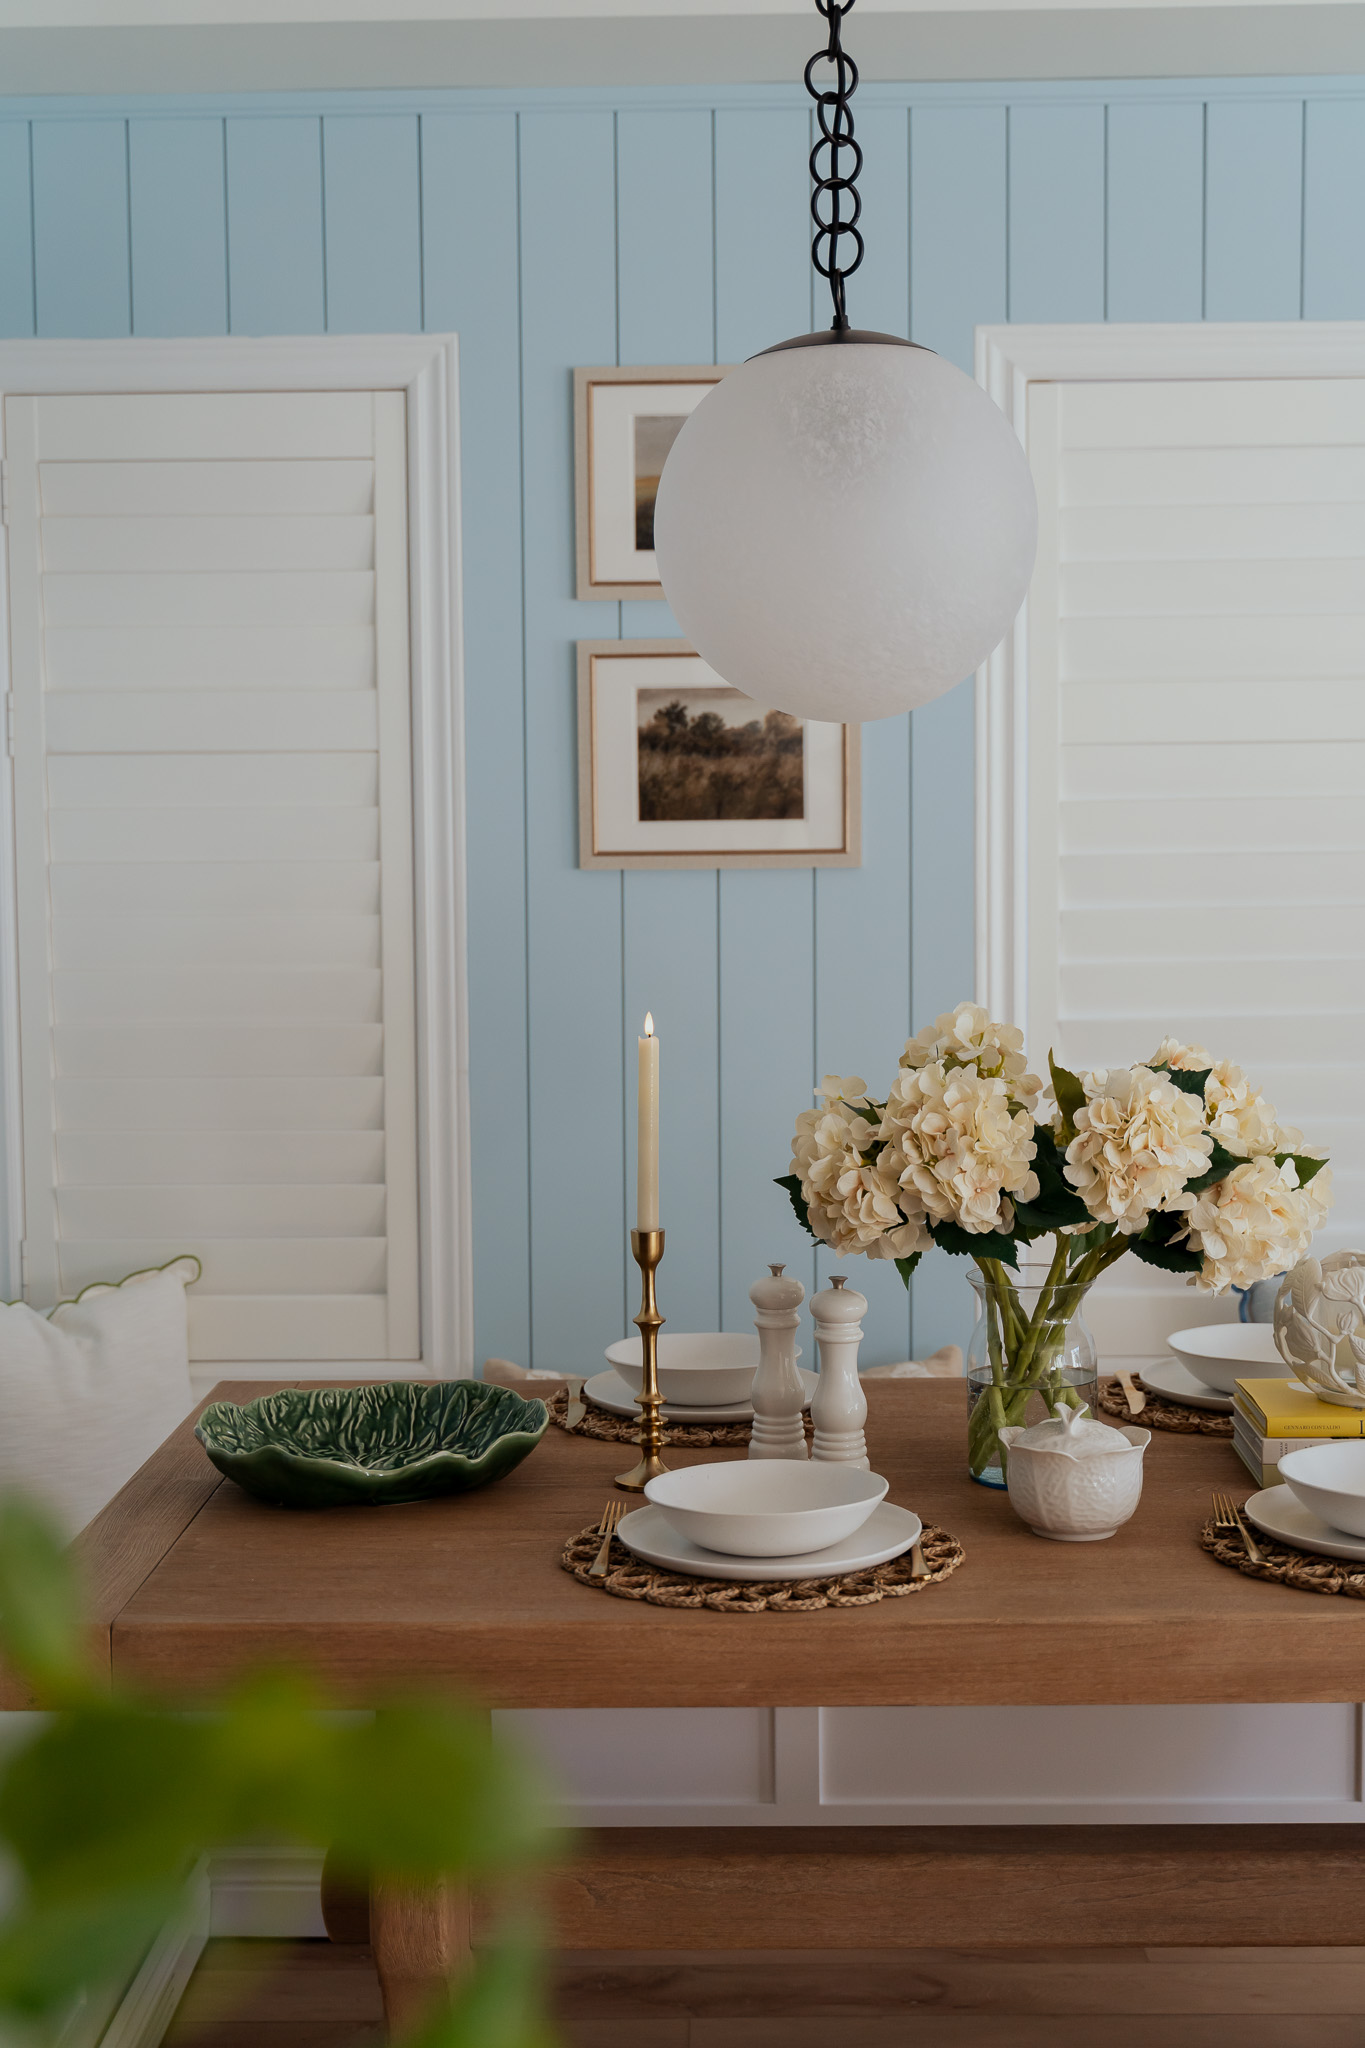
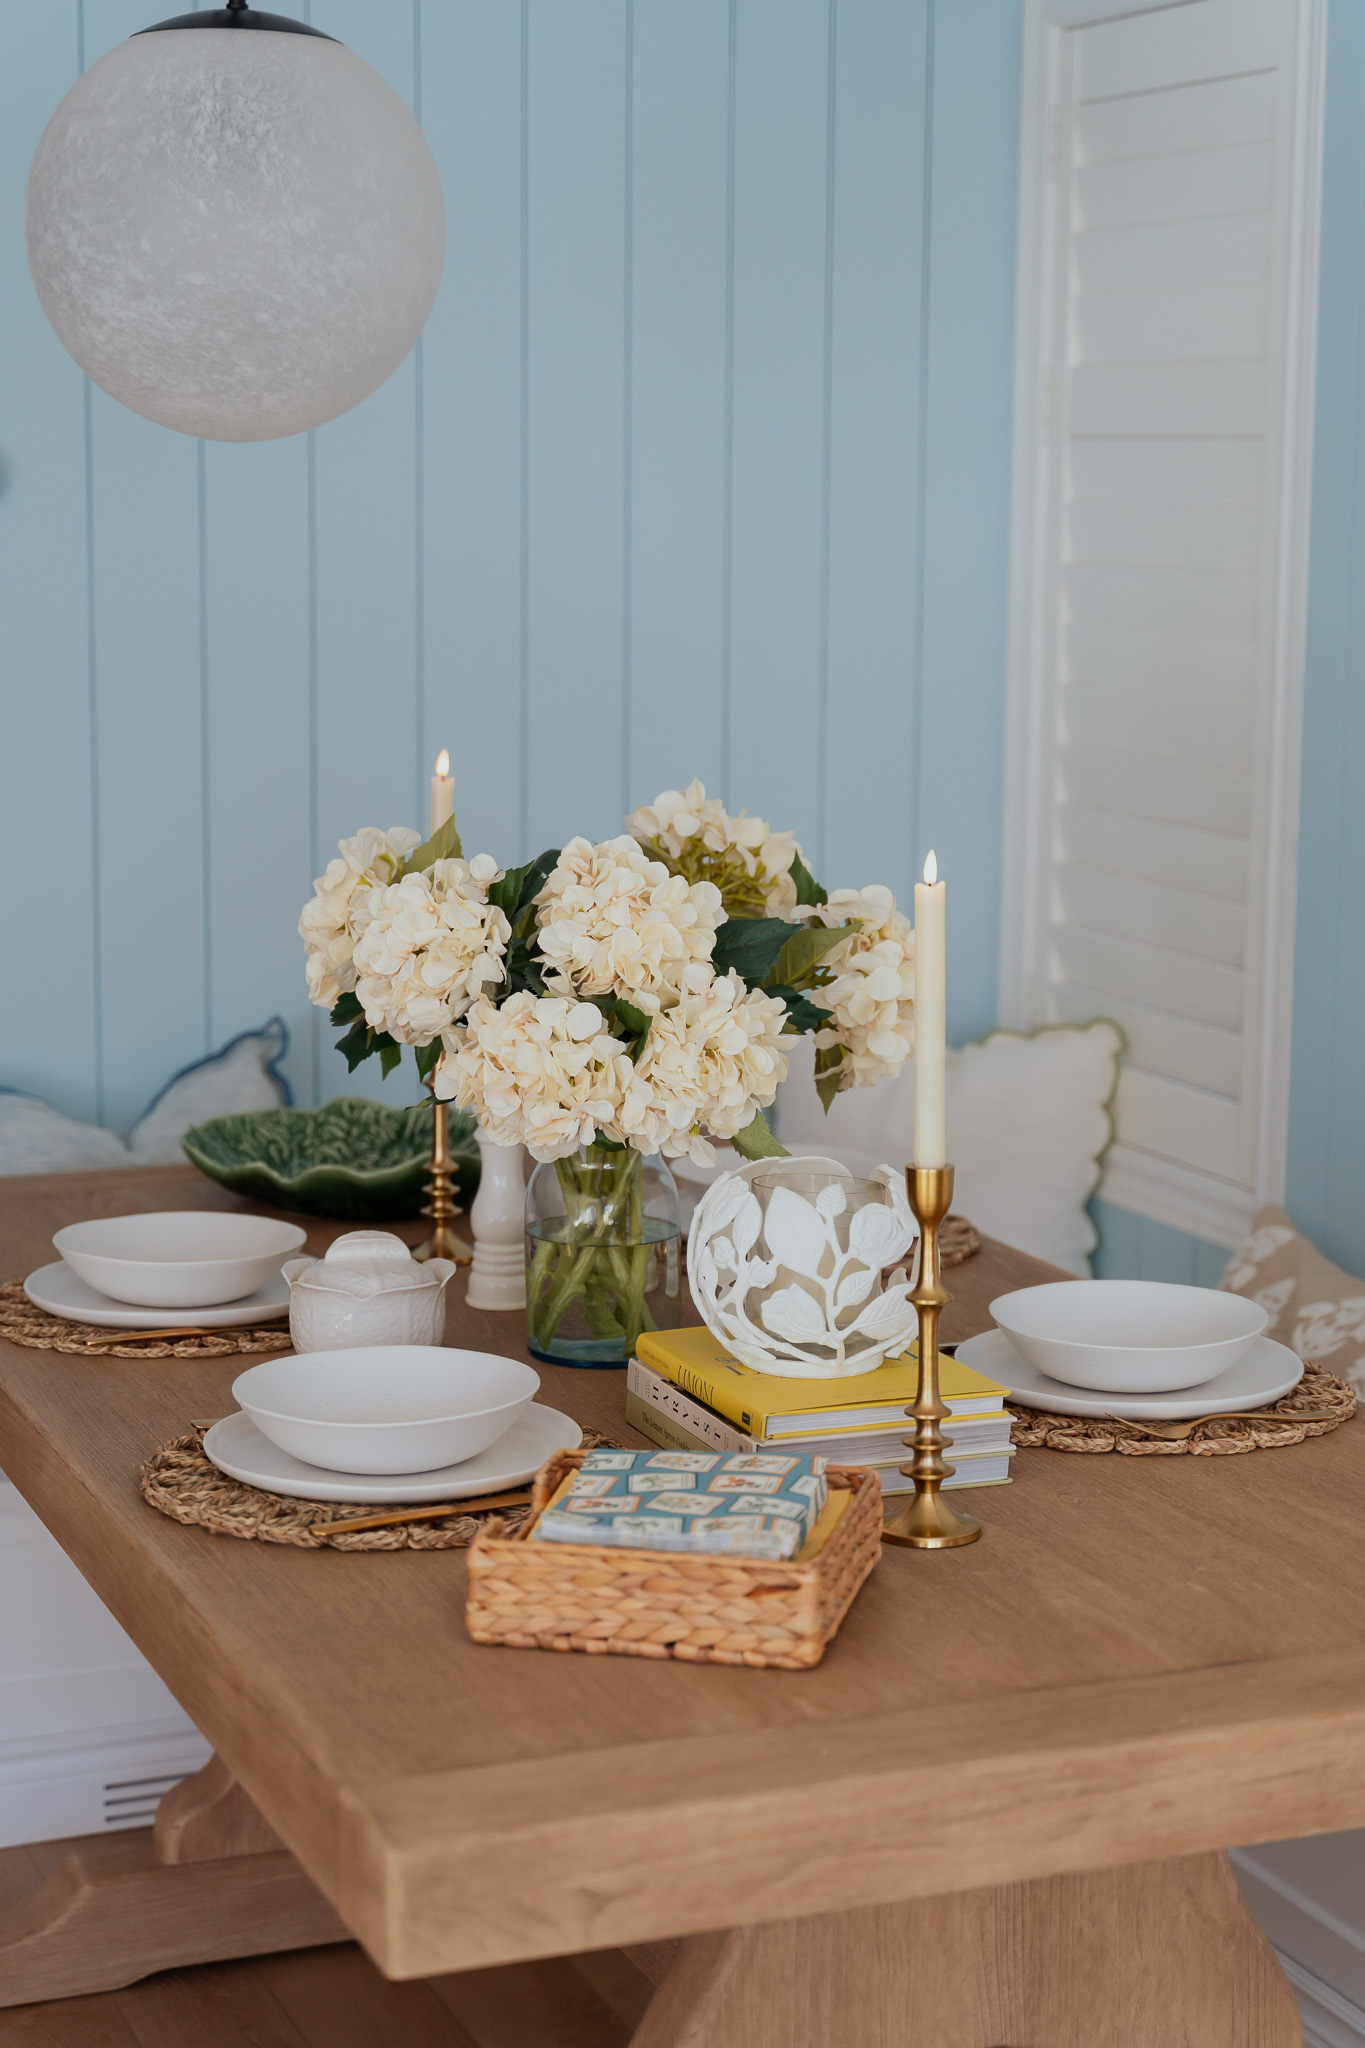
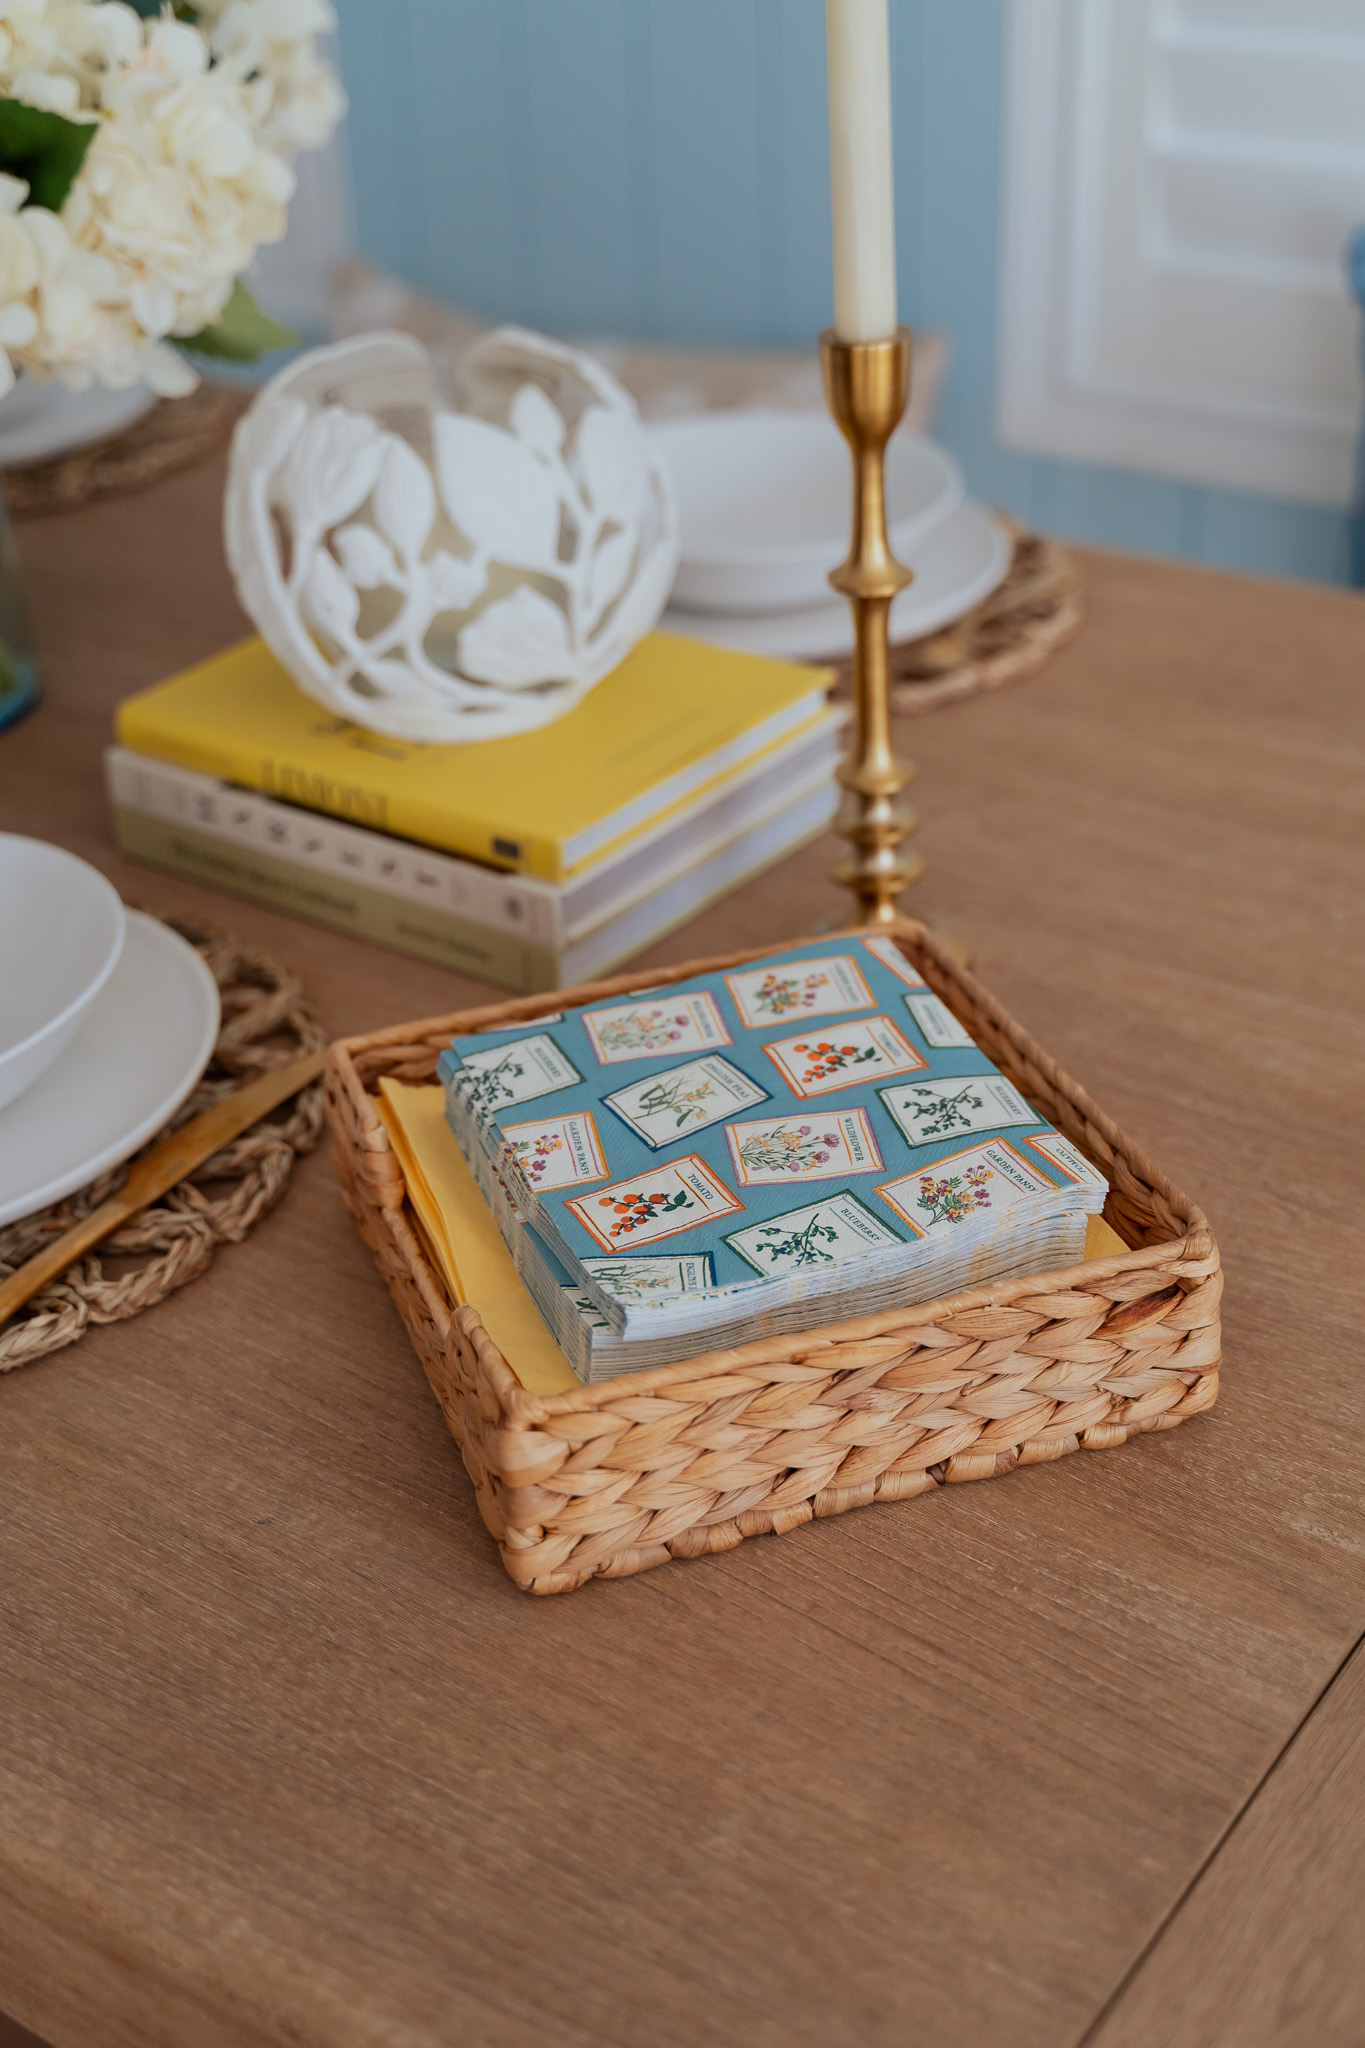
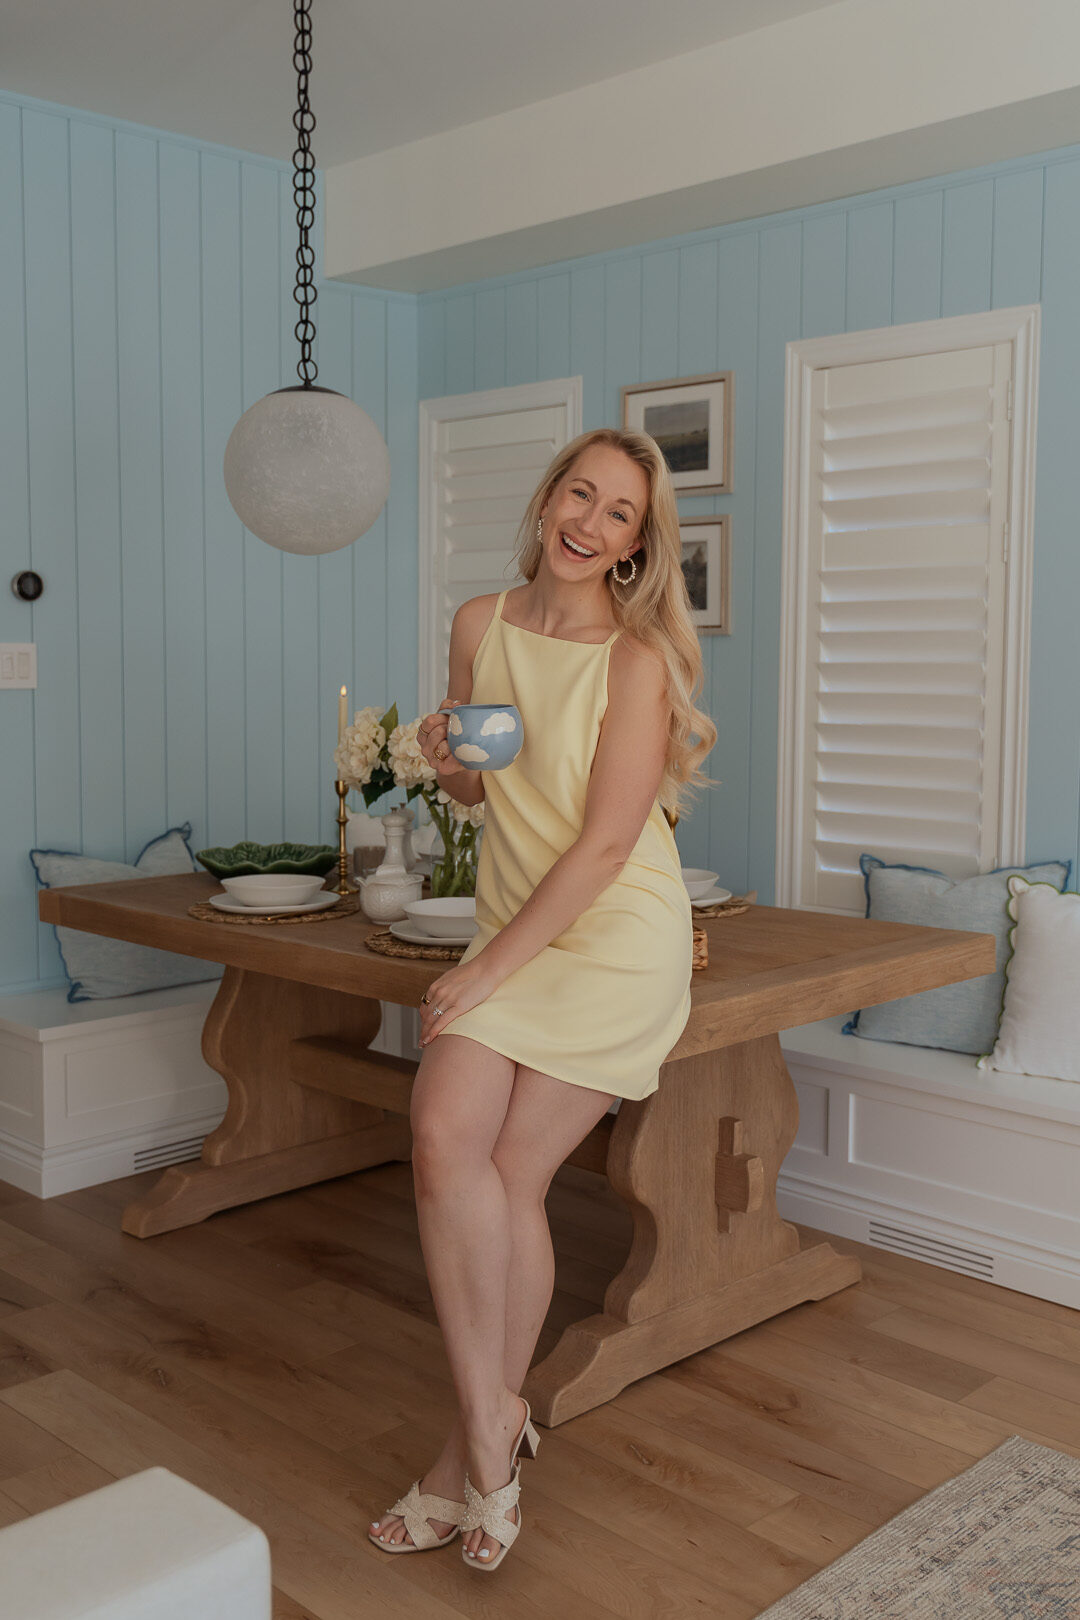
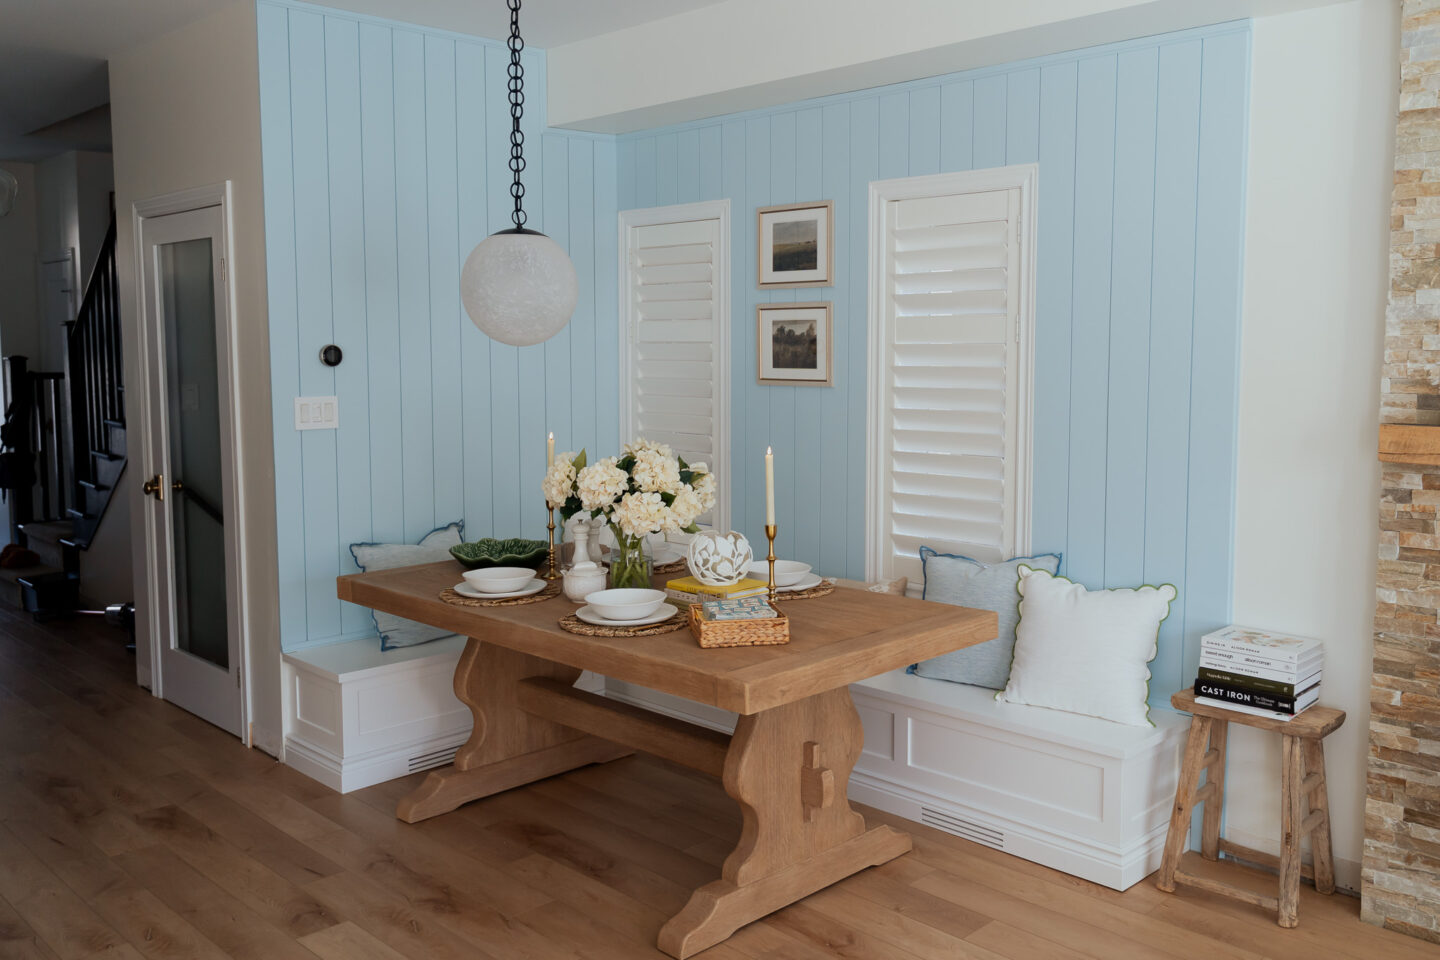
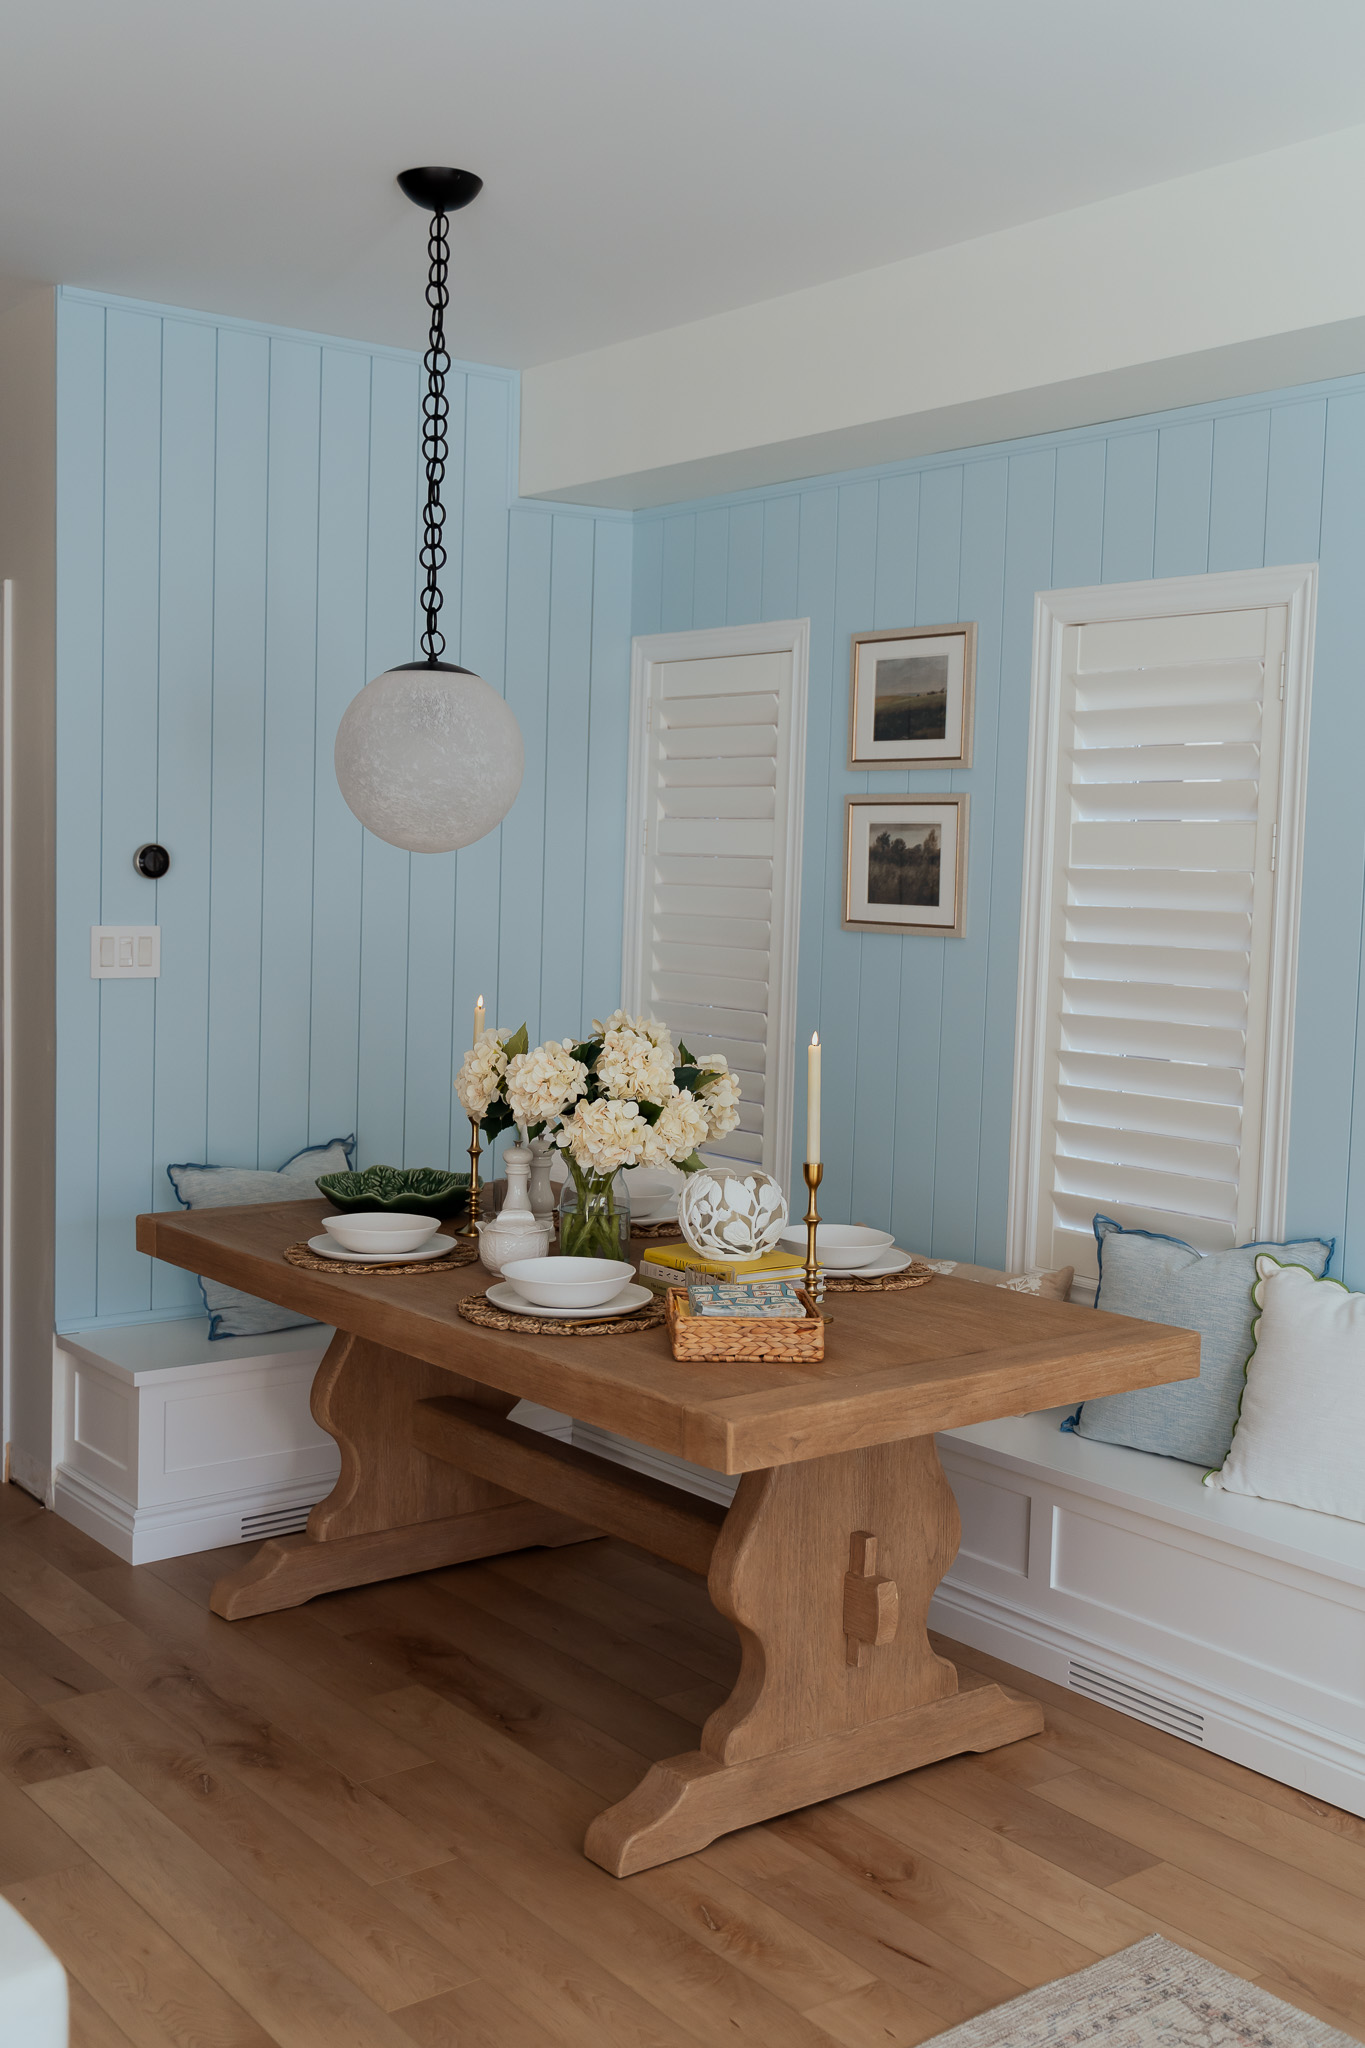
Add Decor and Character to Your Space:
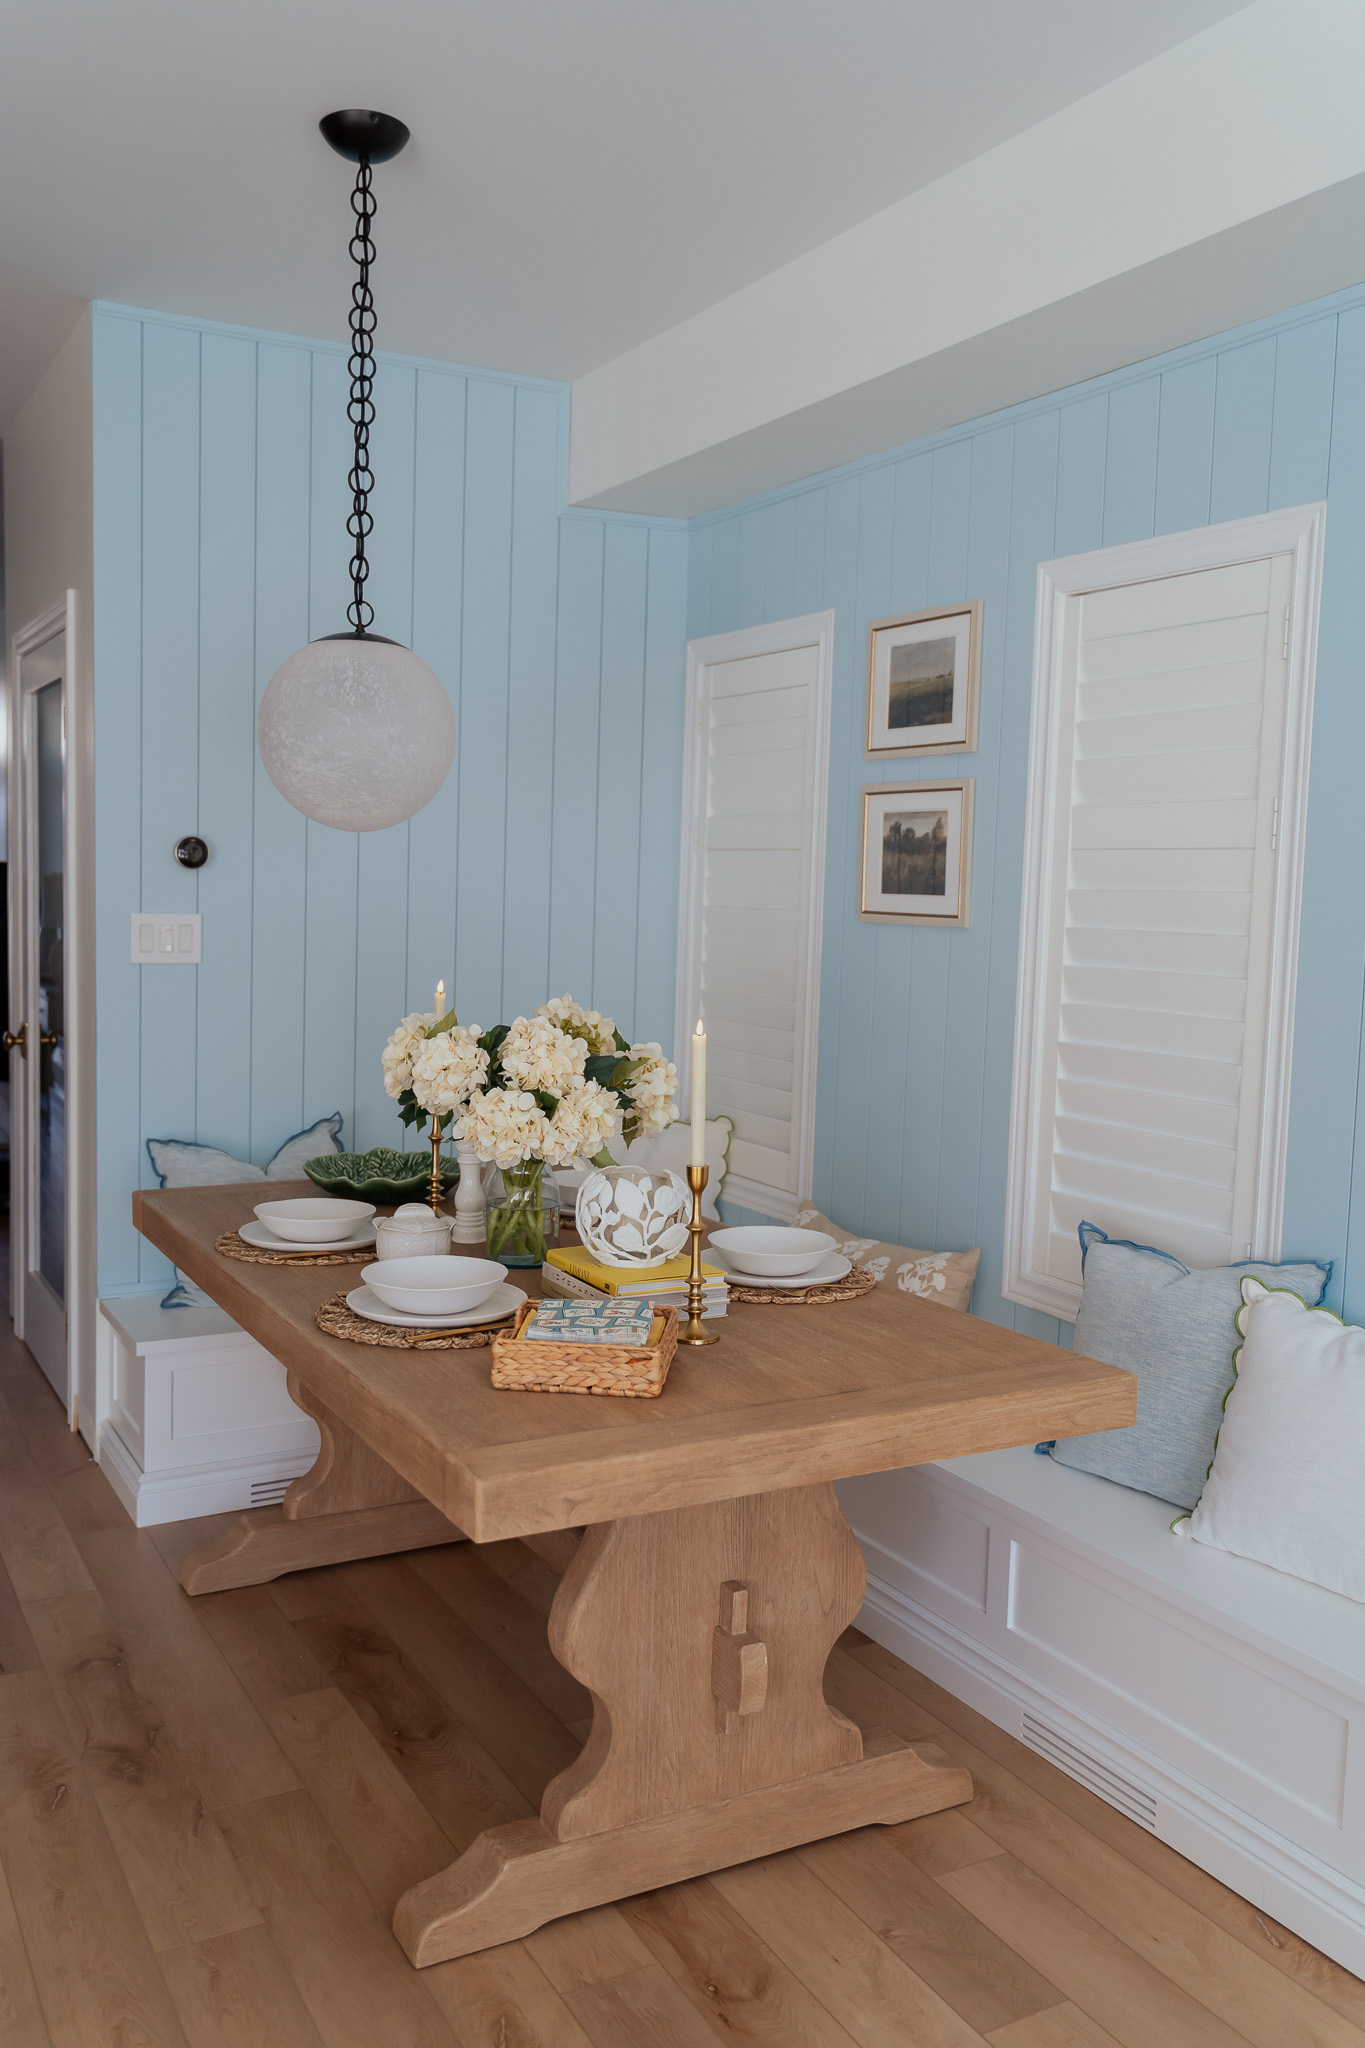
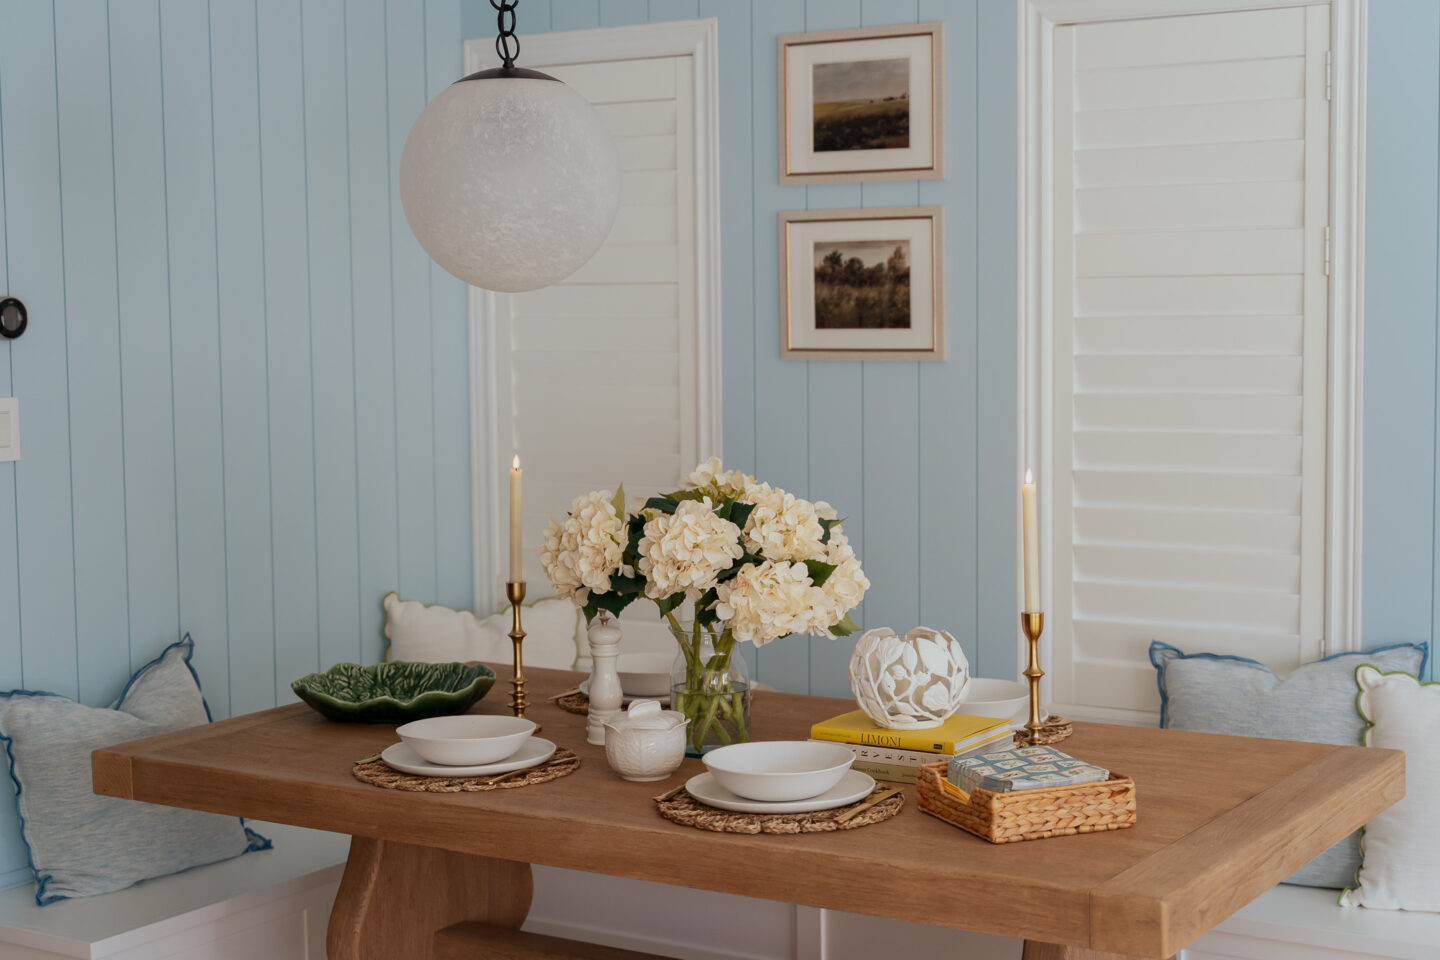
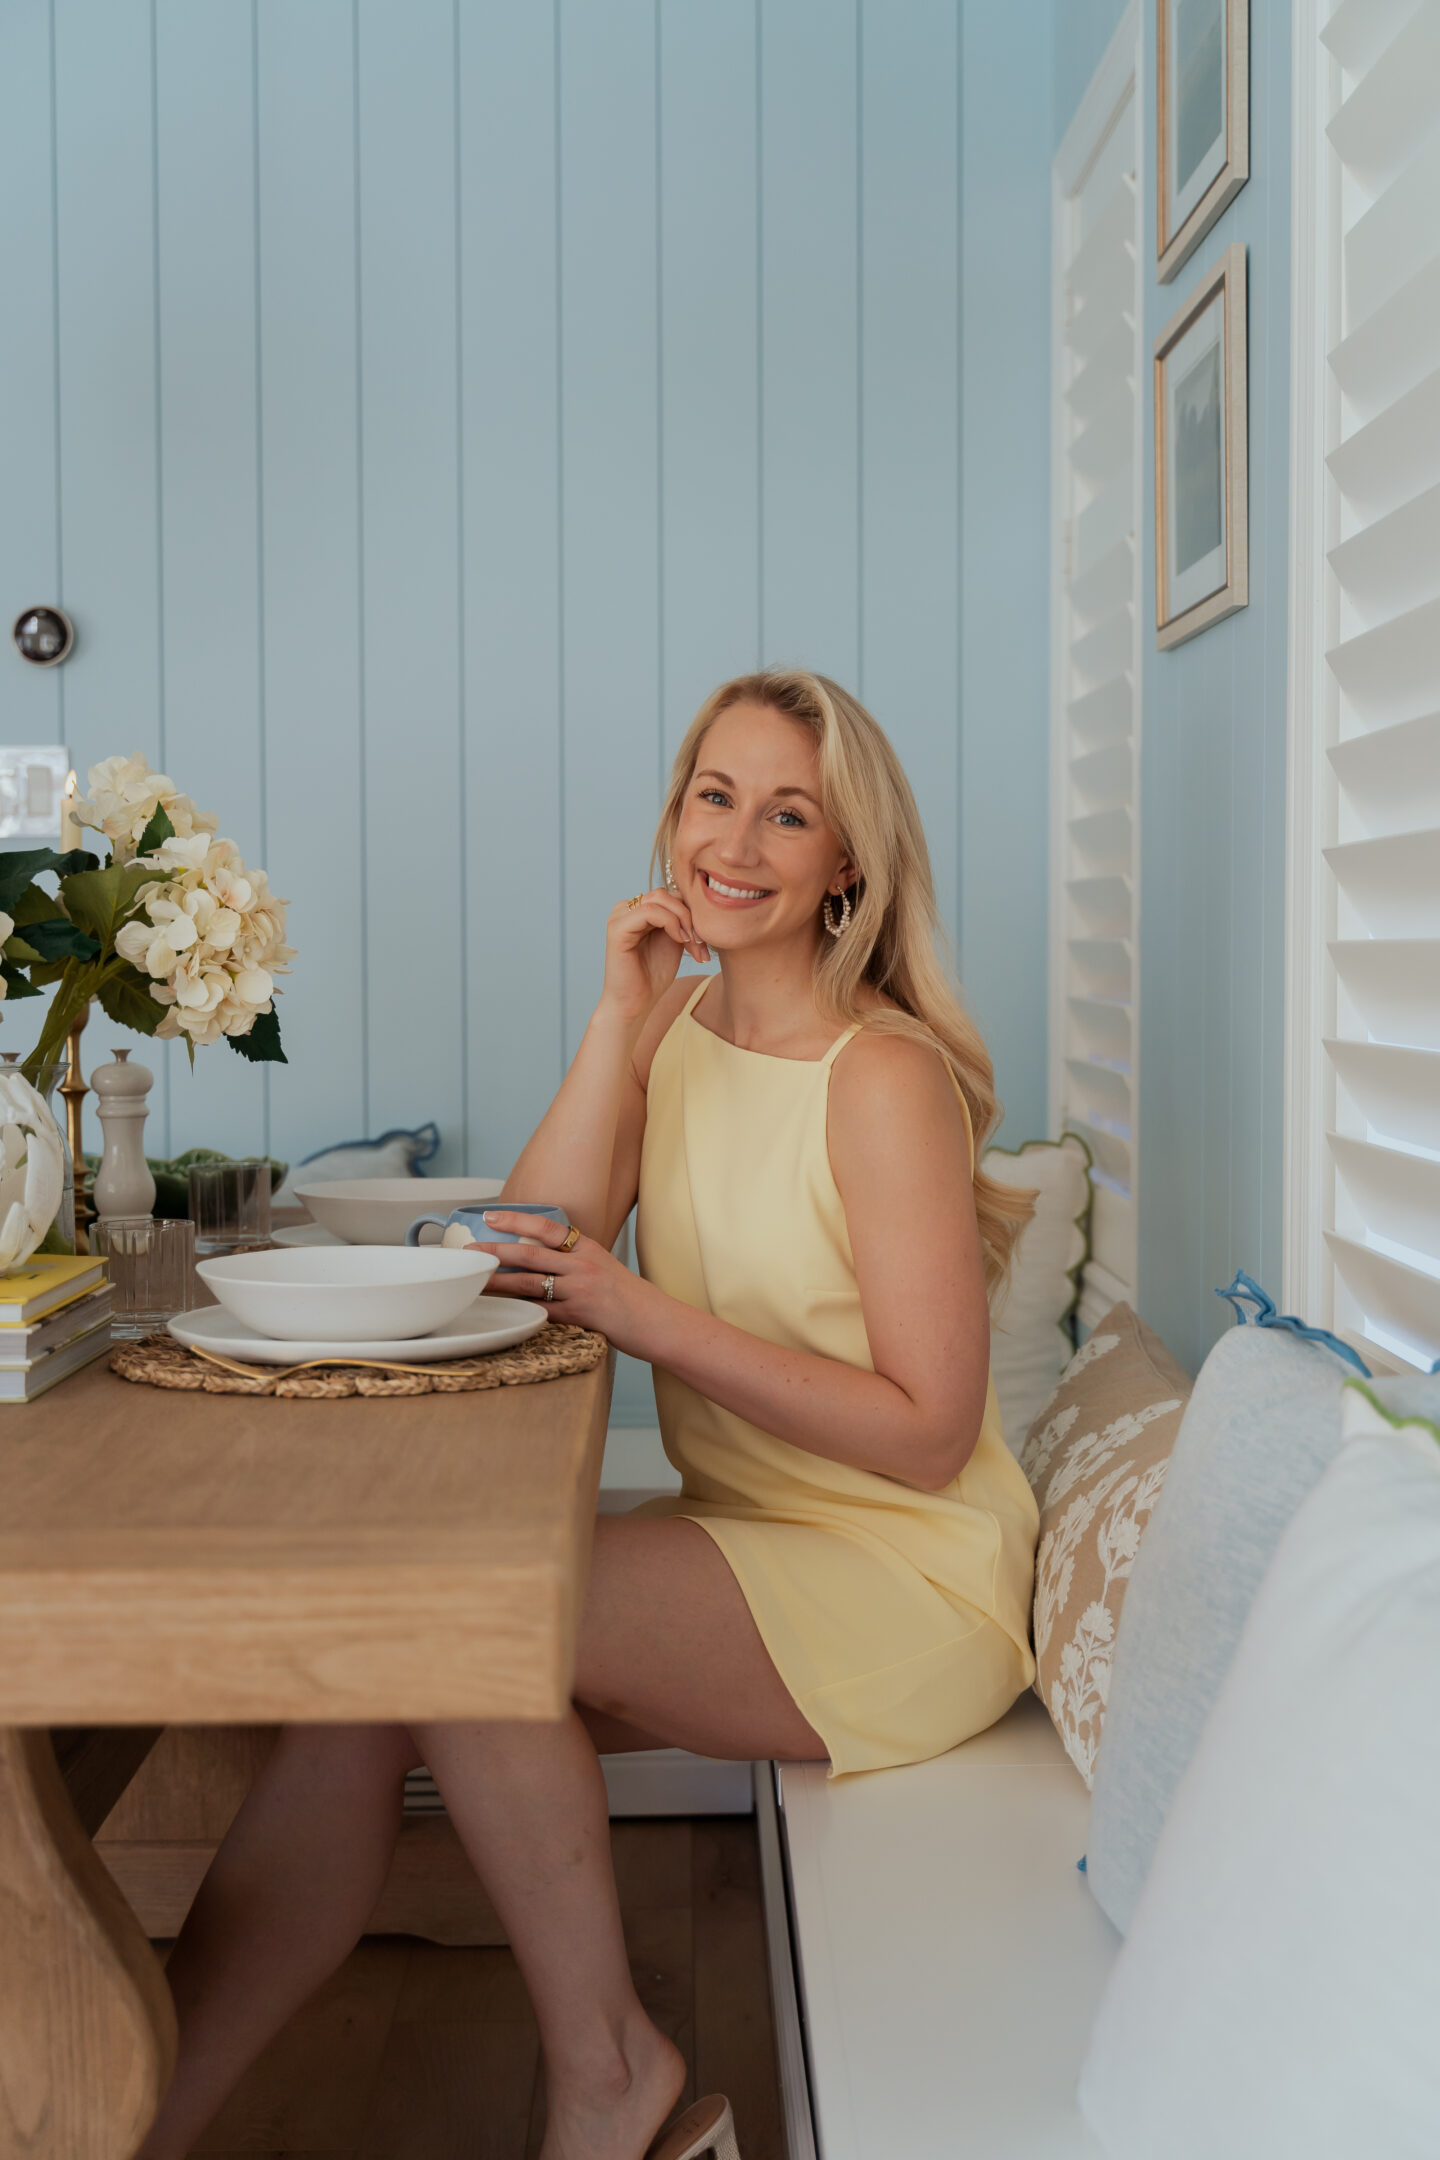
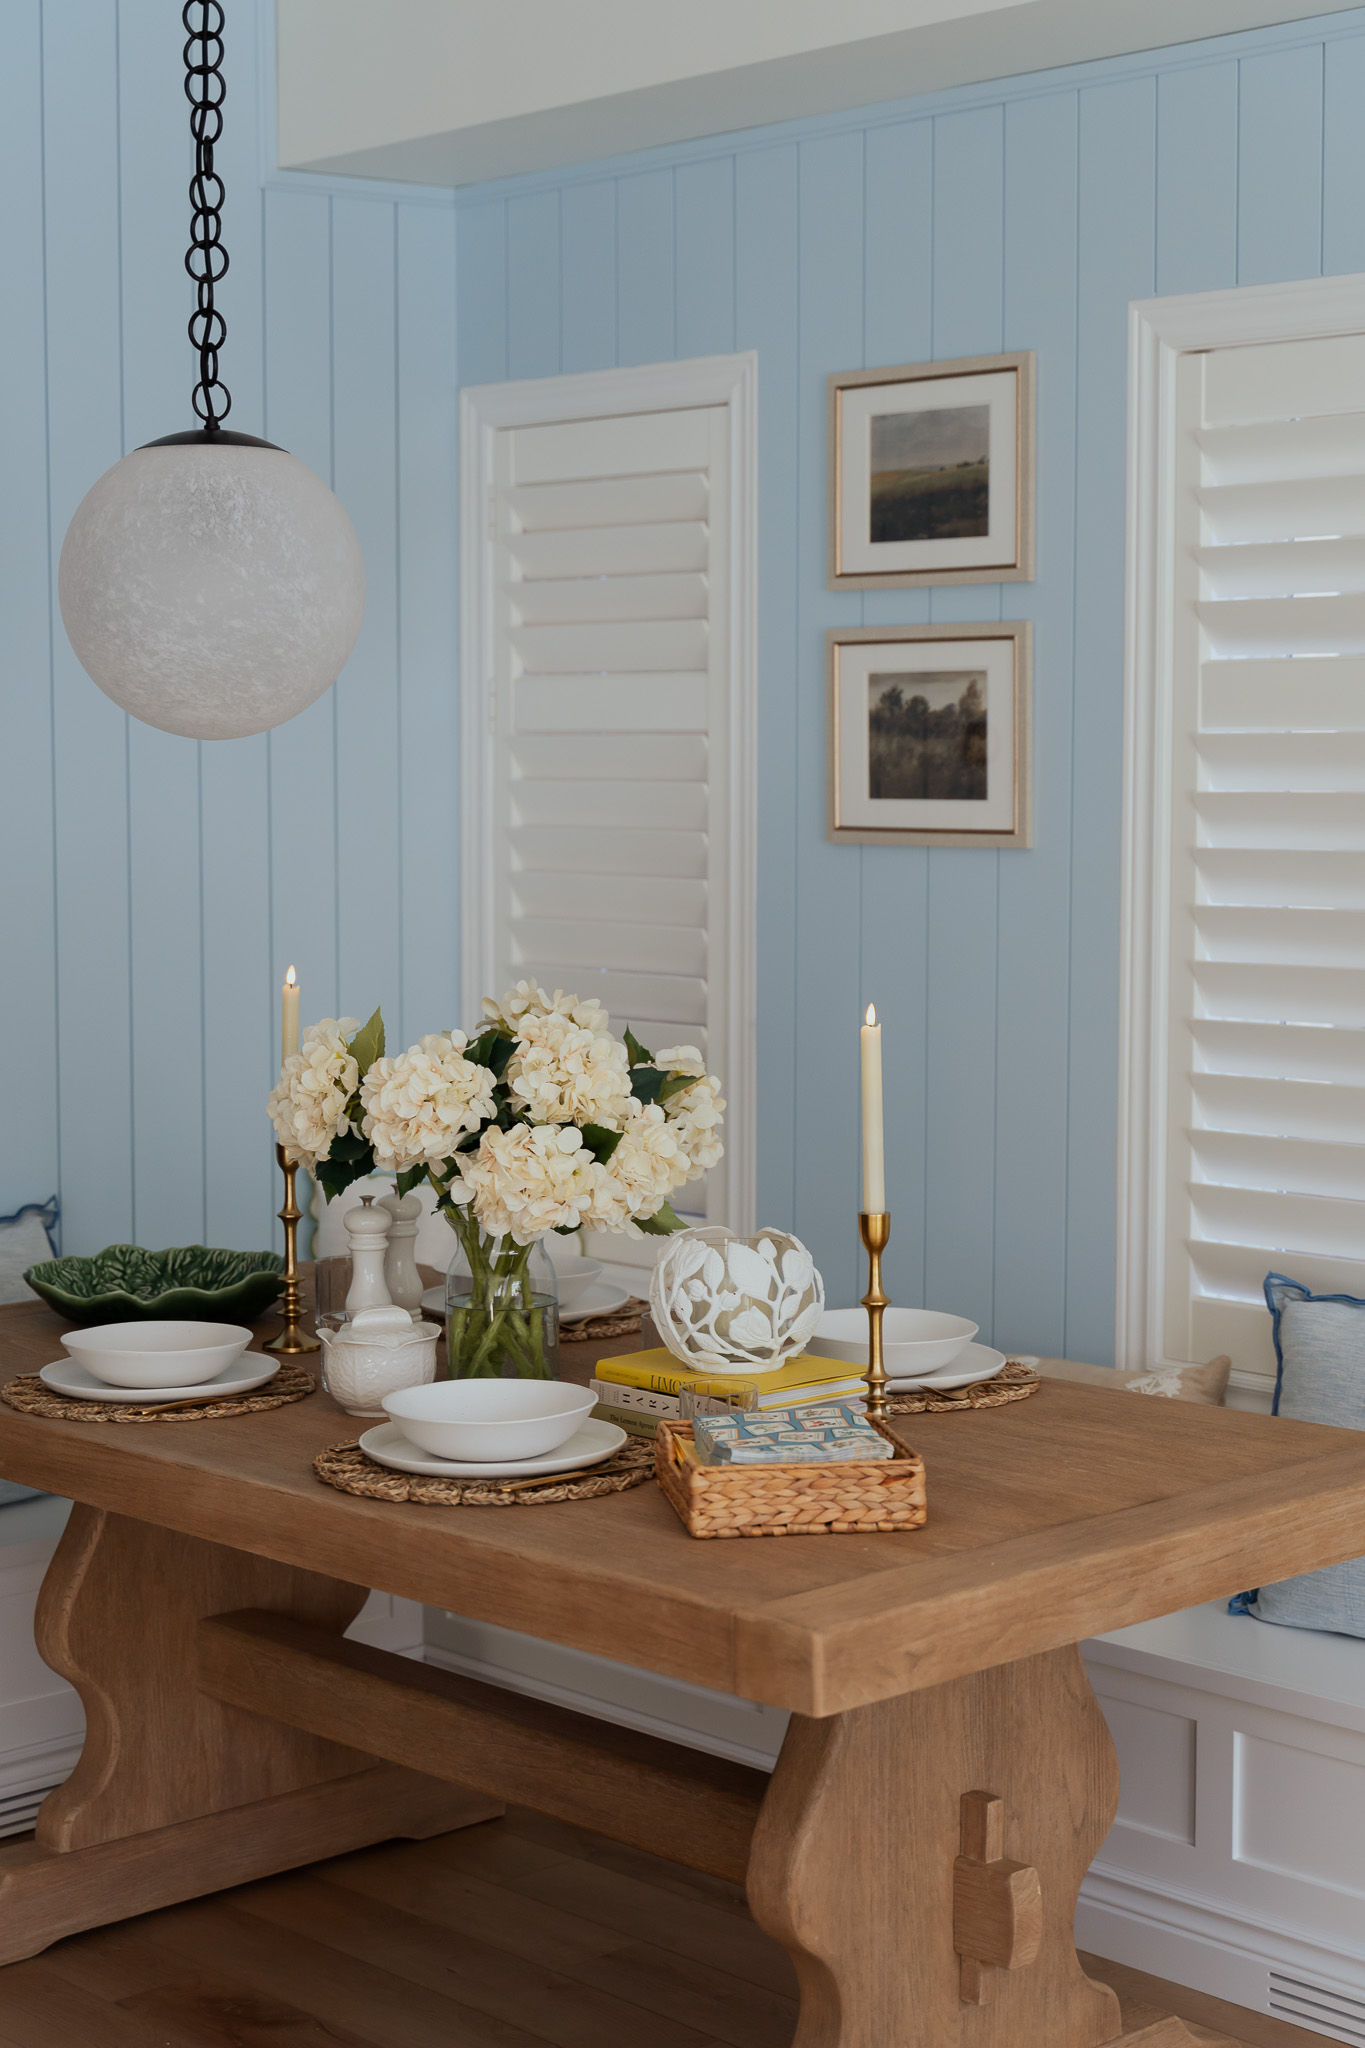
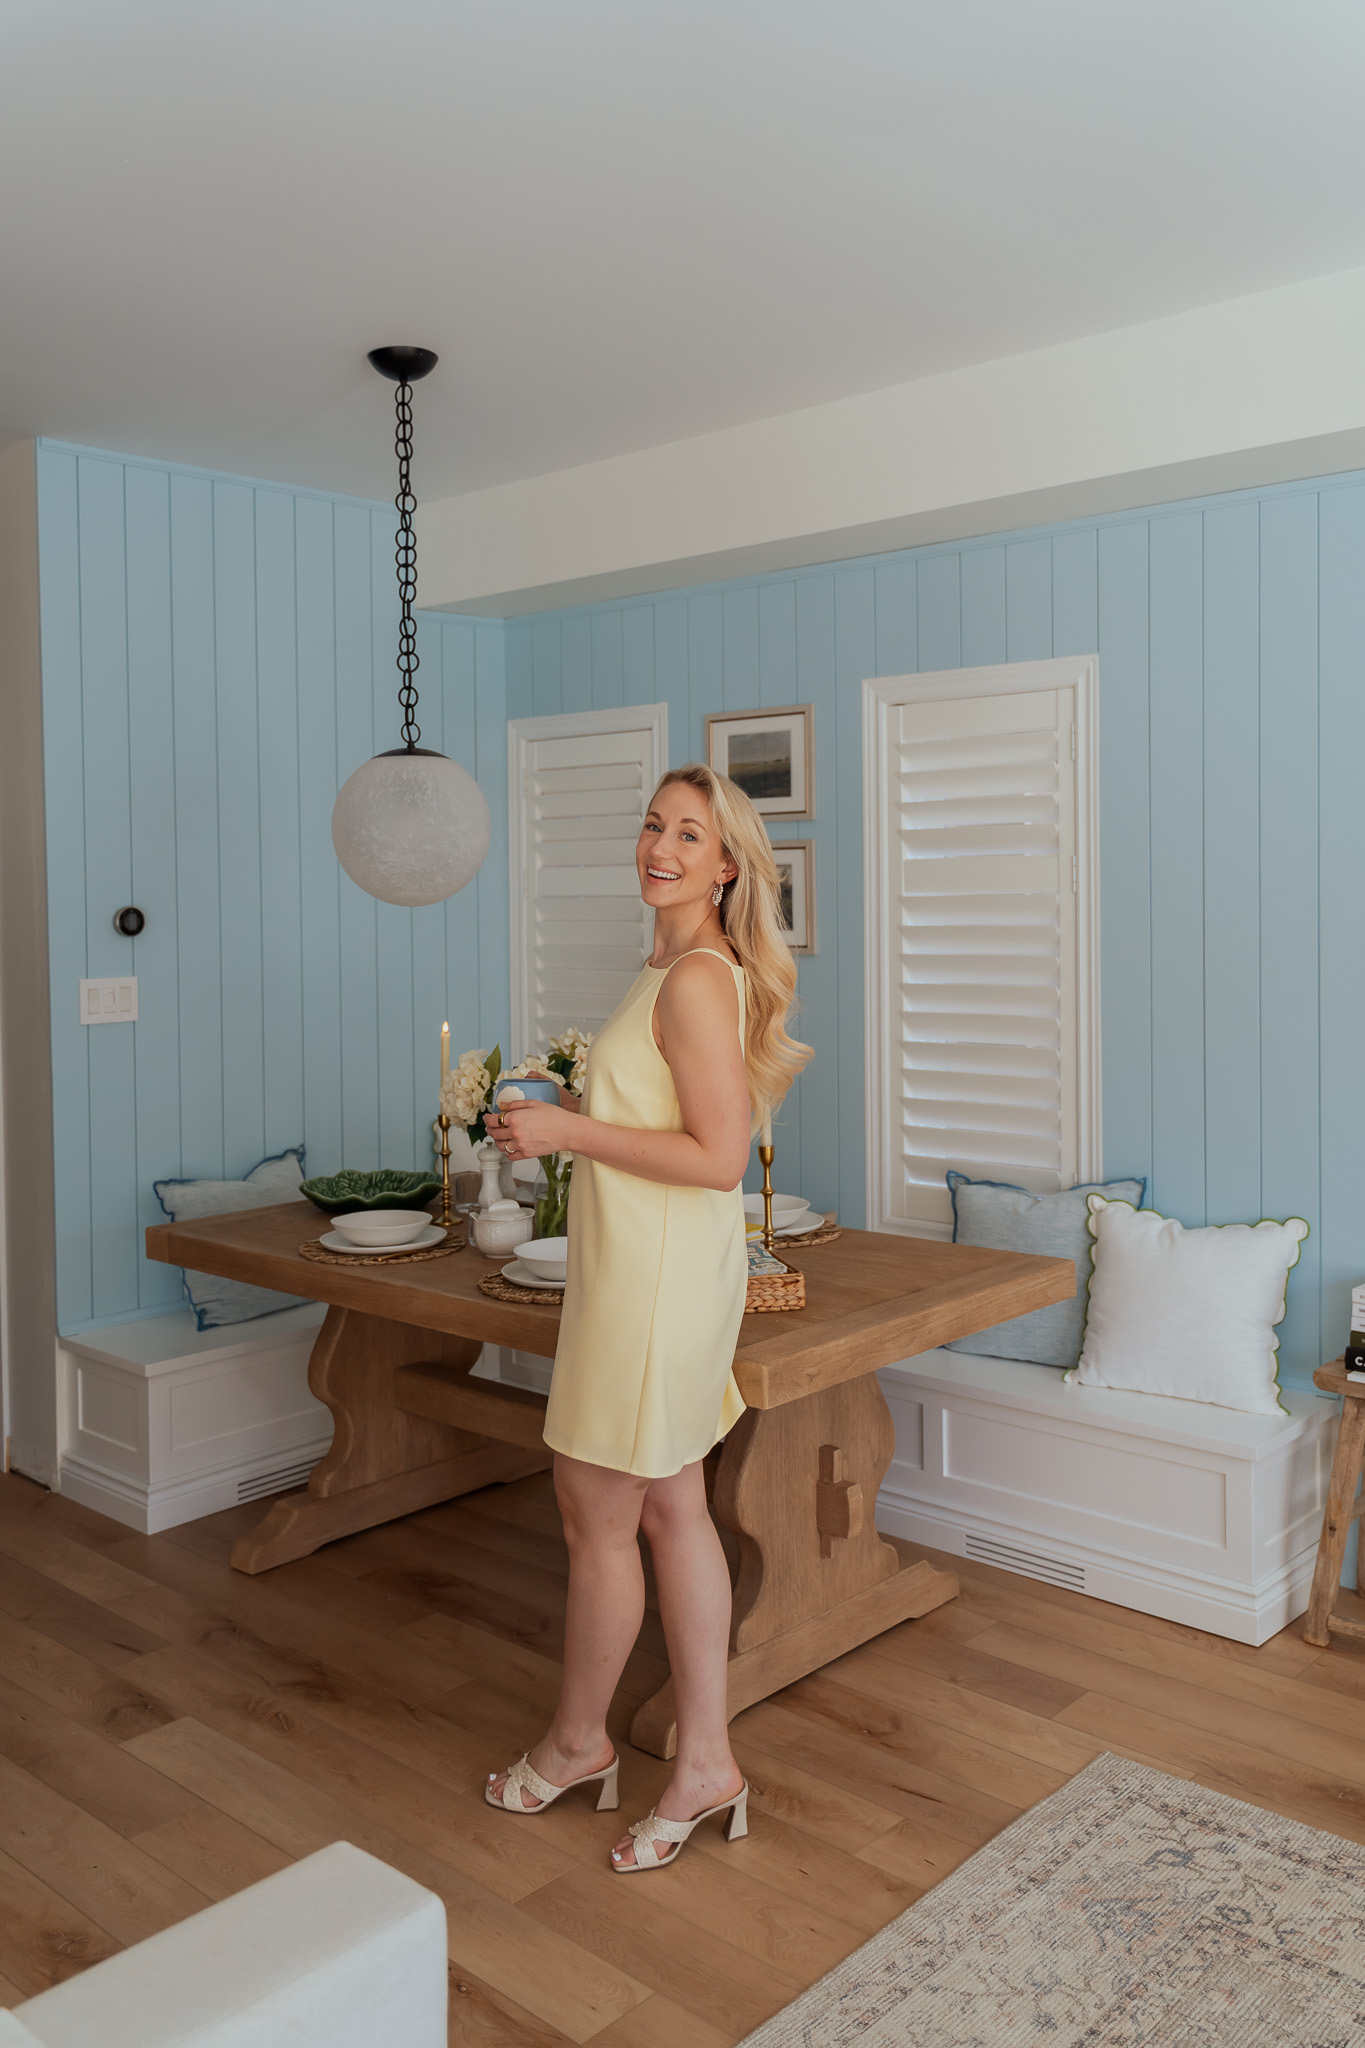
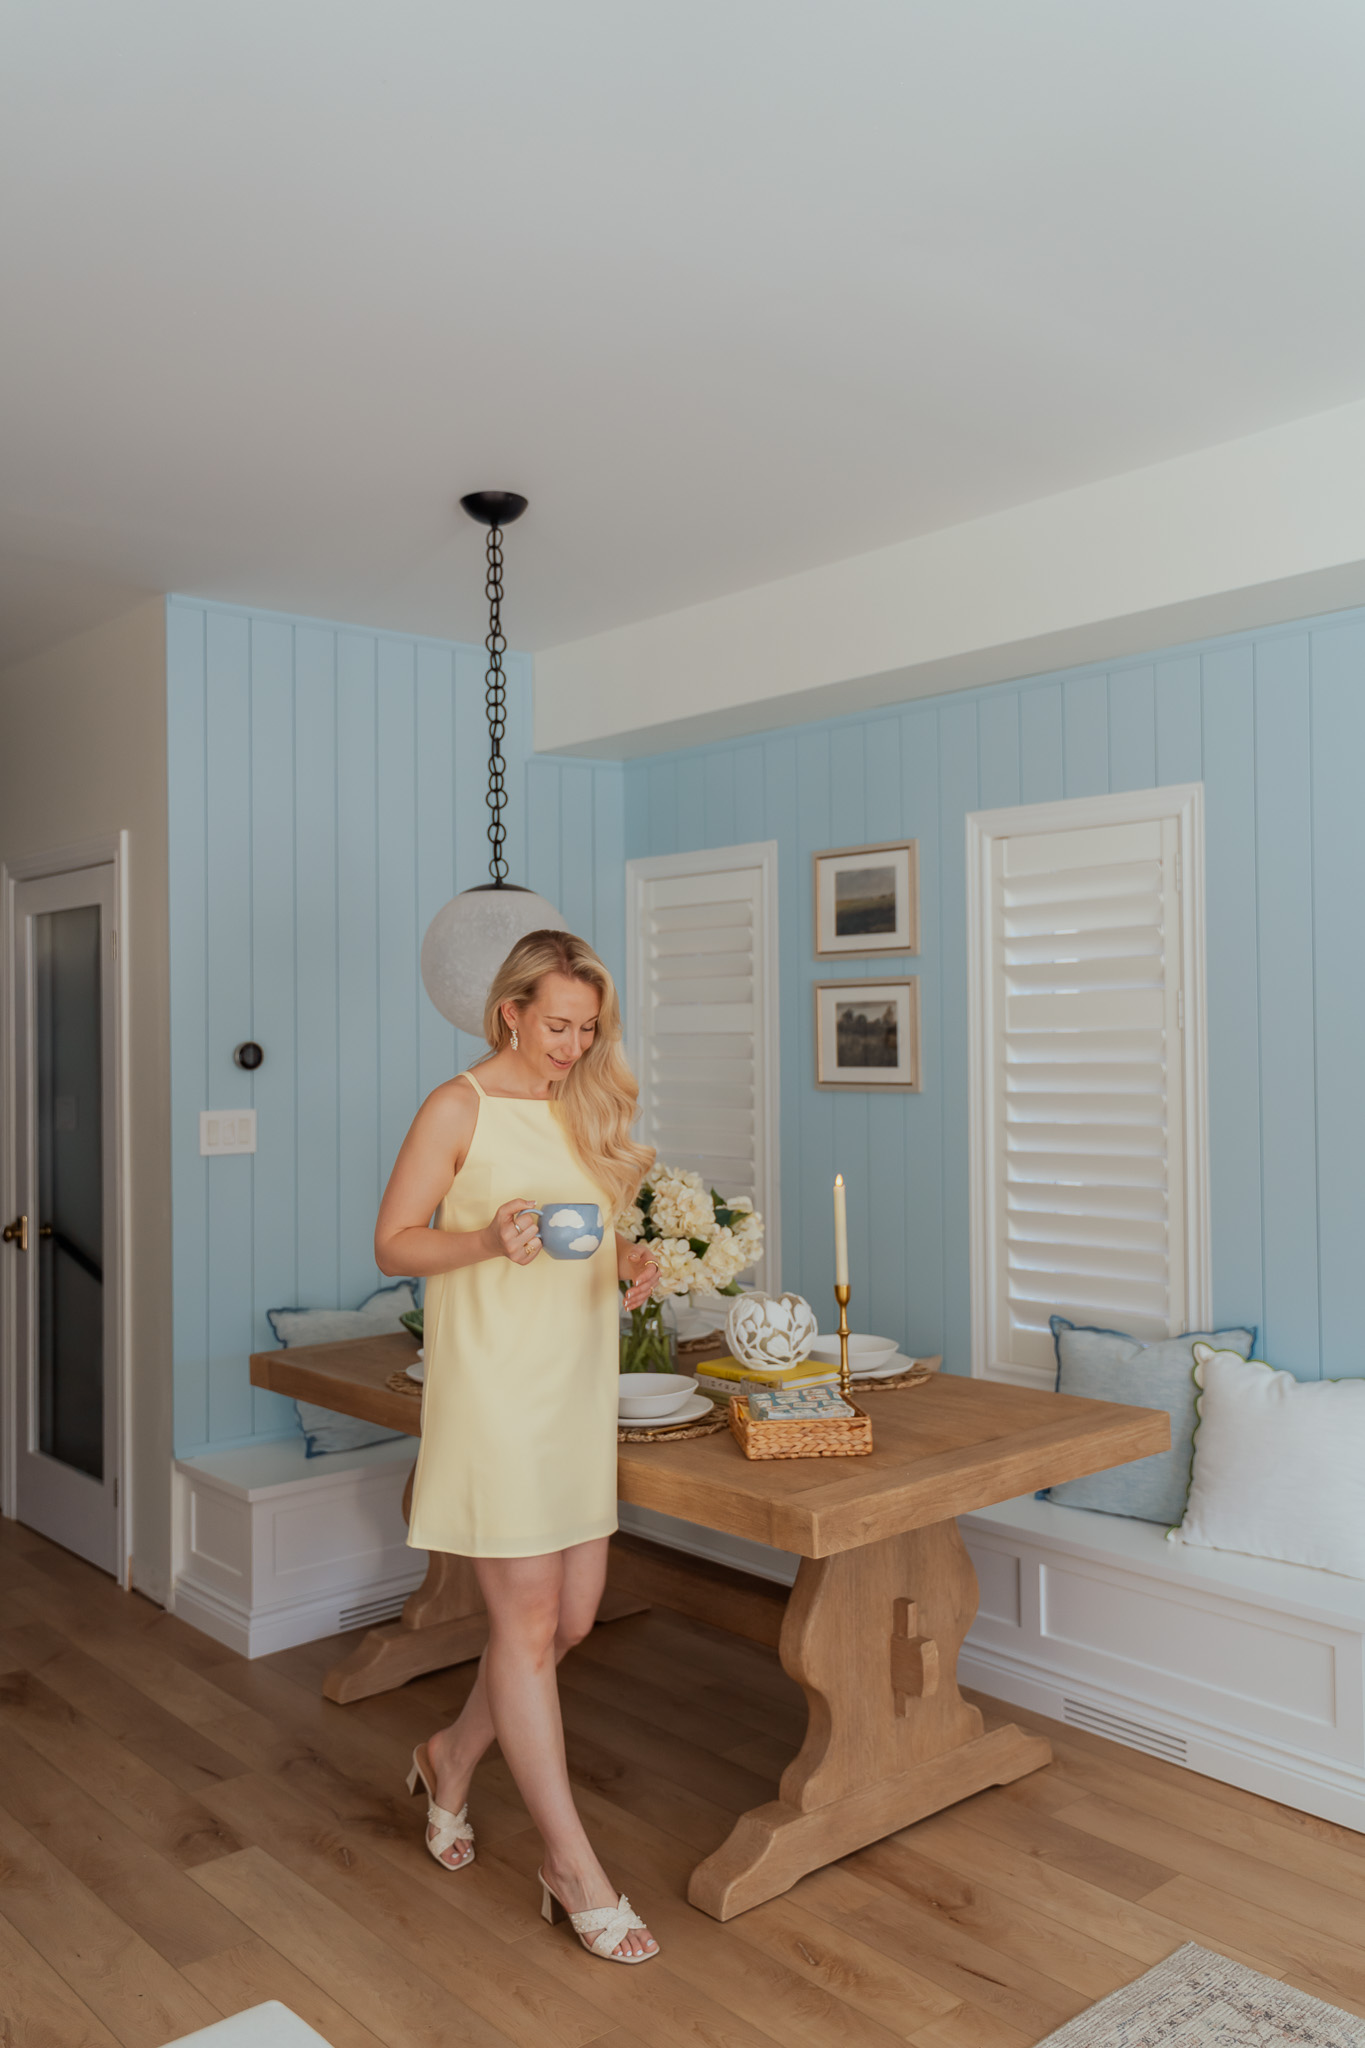
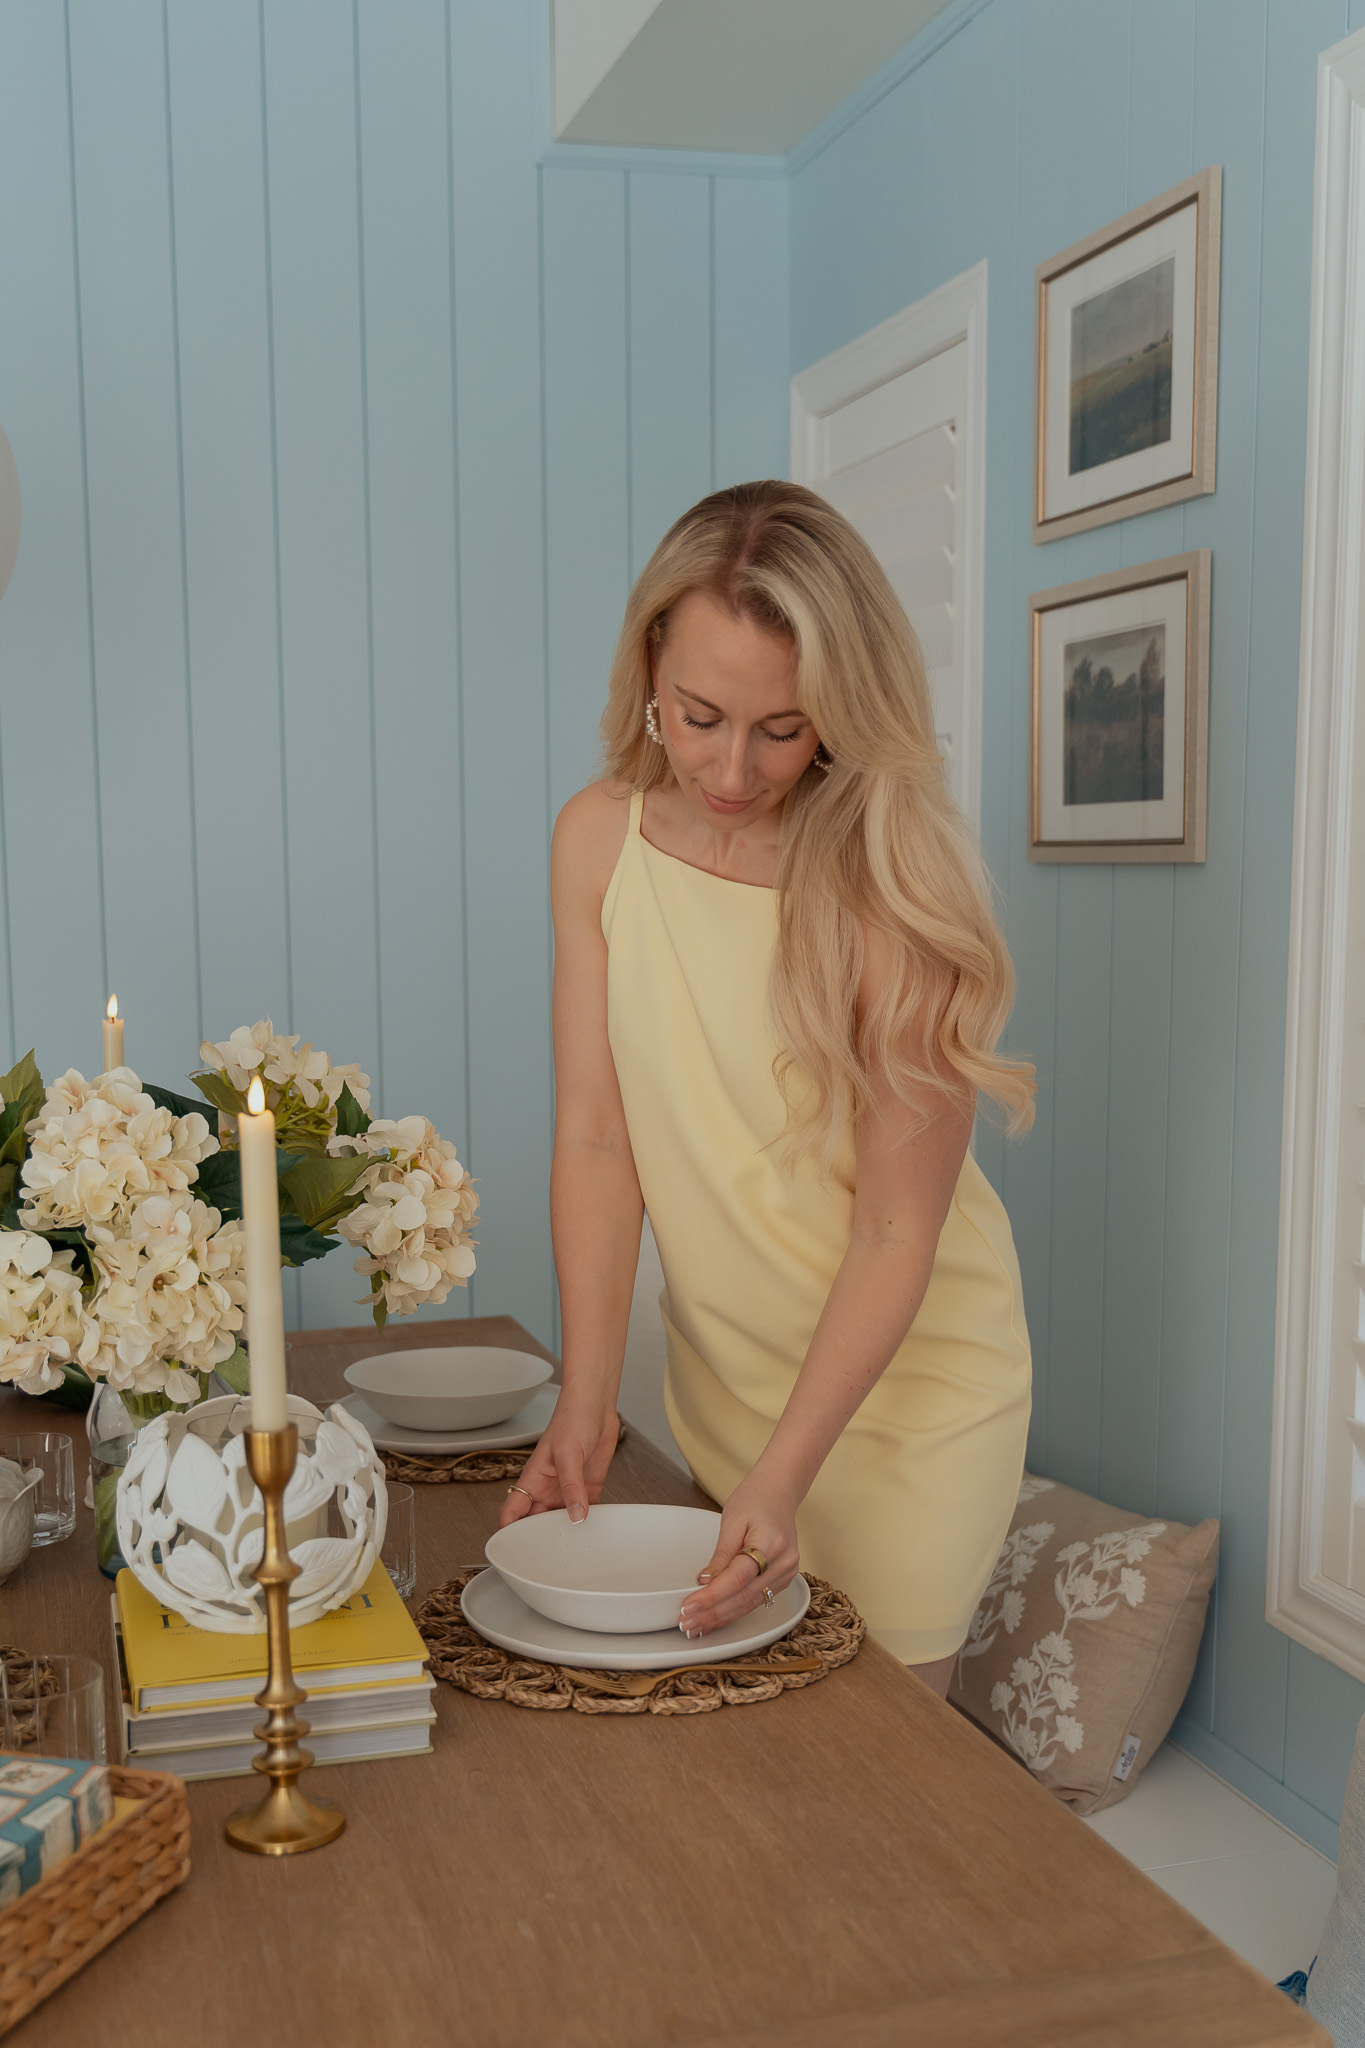
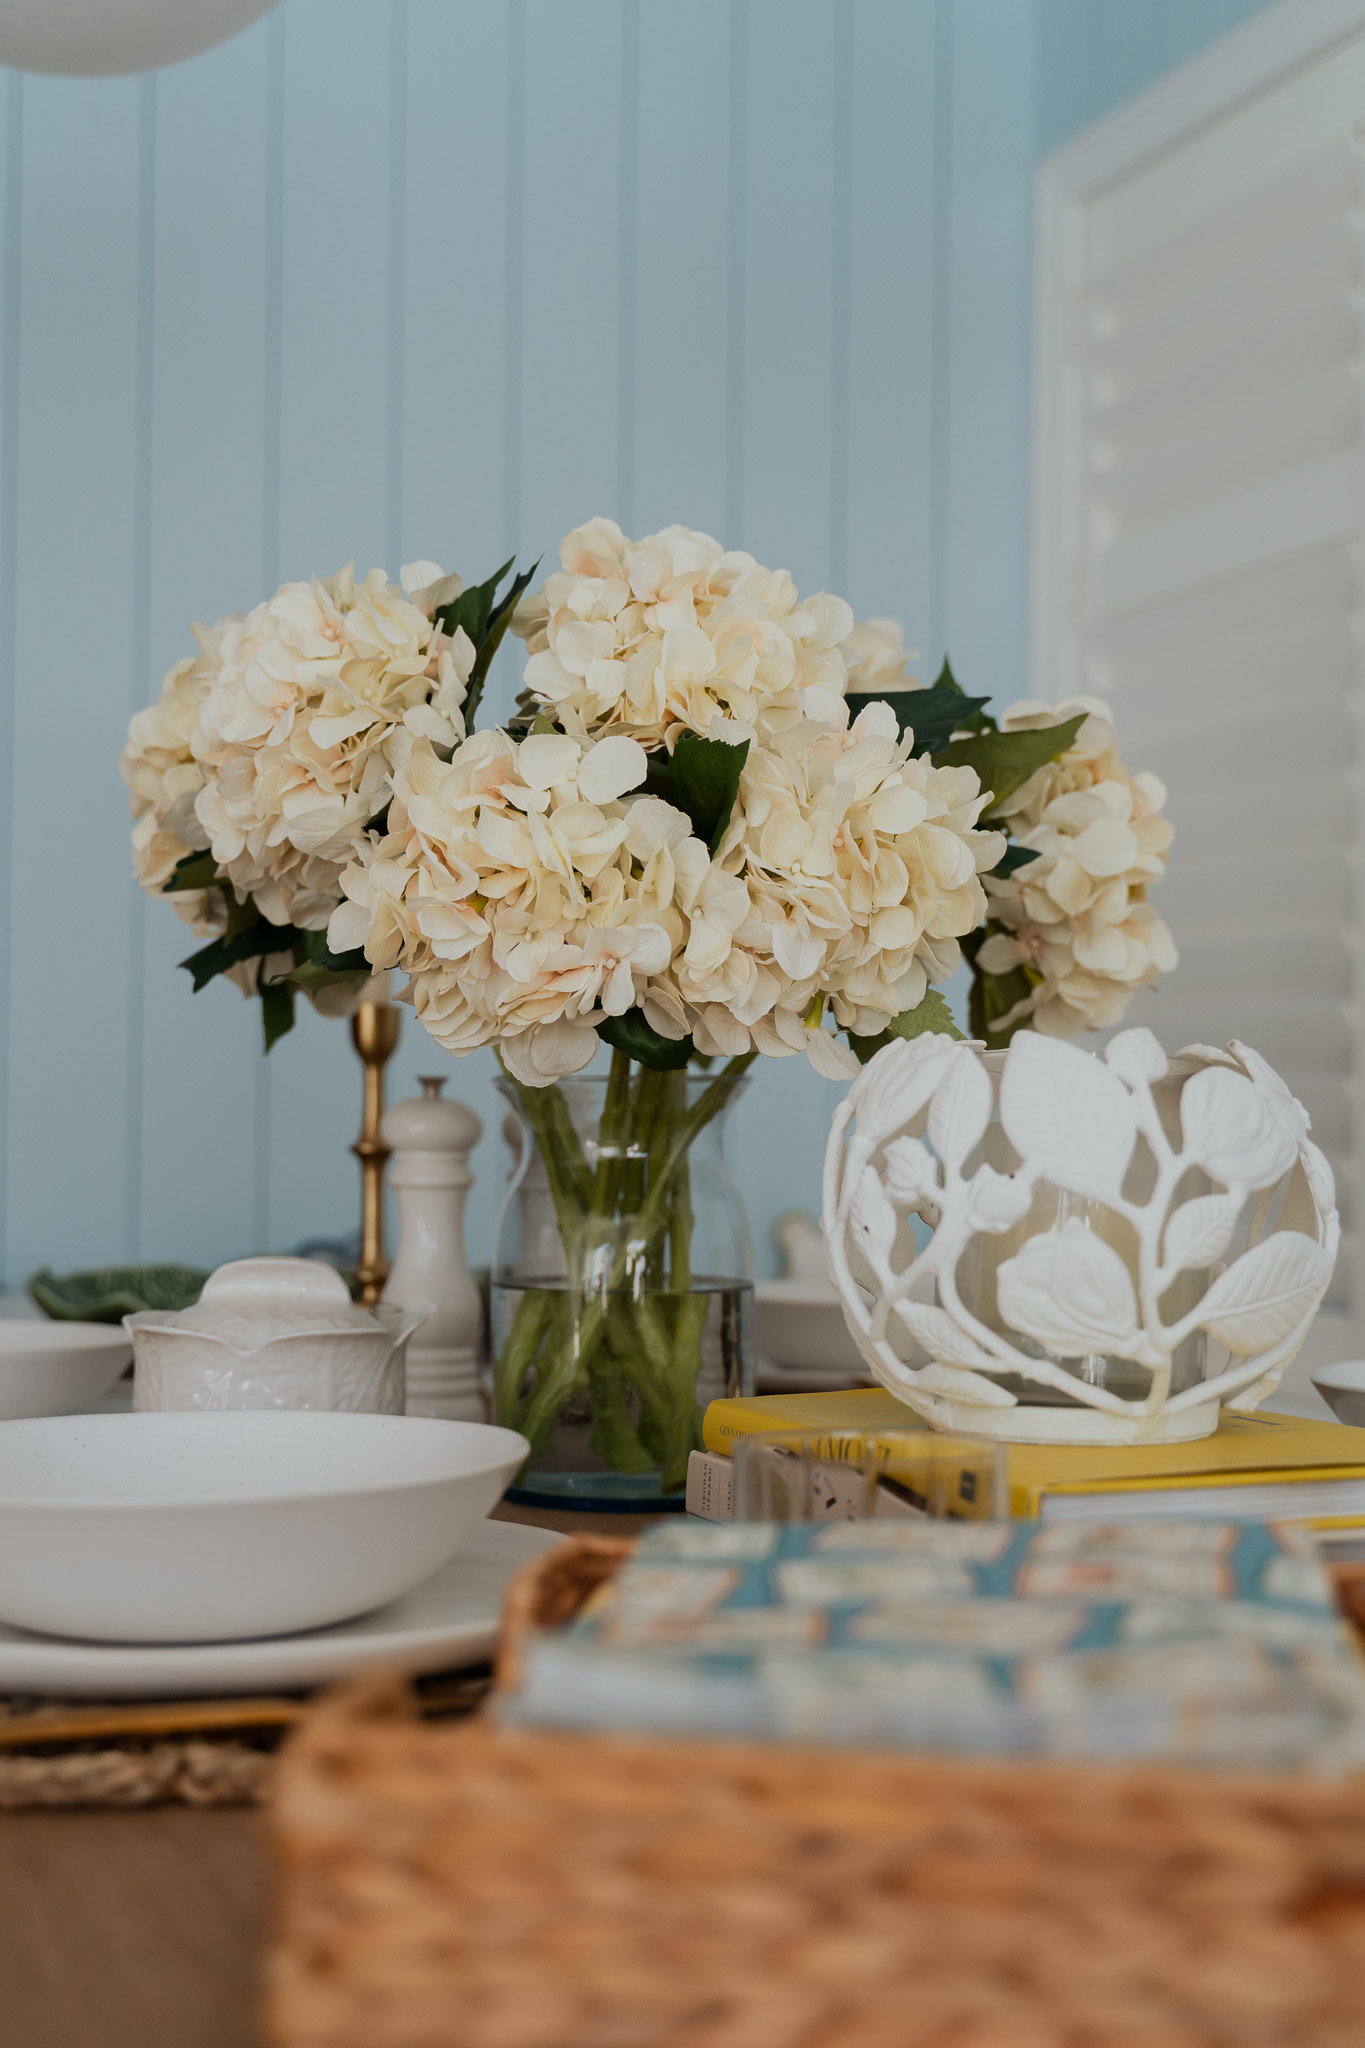
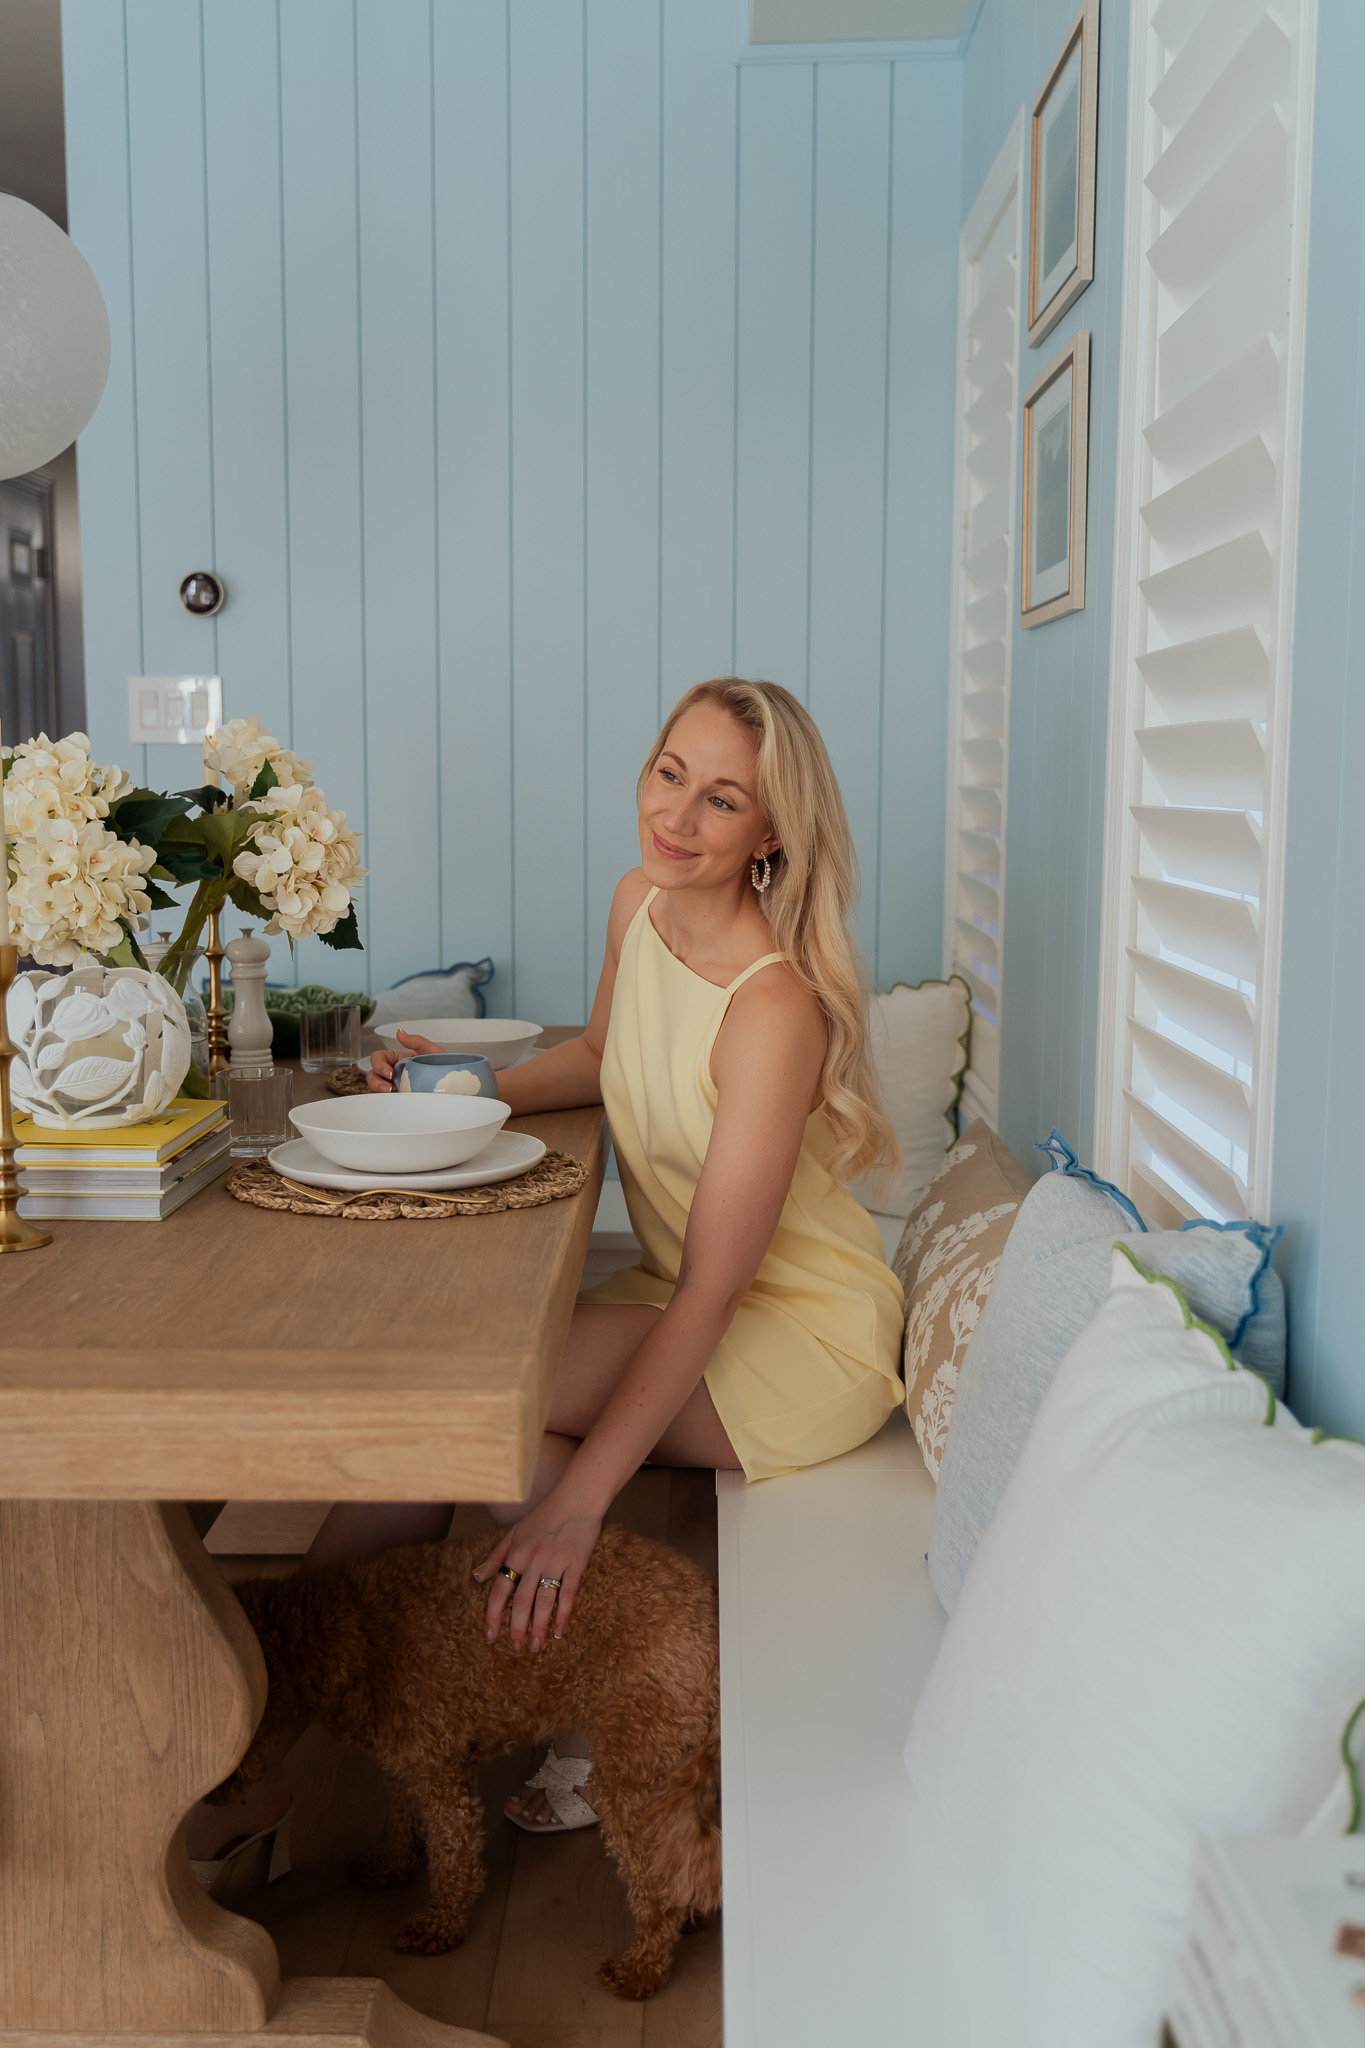
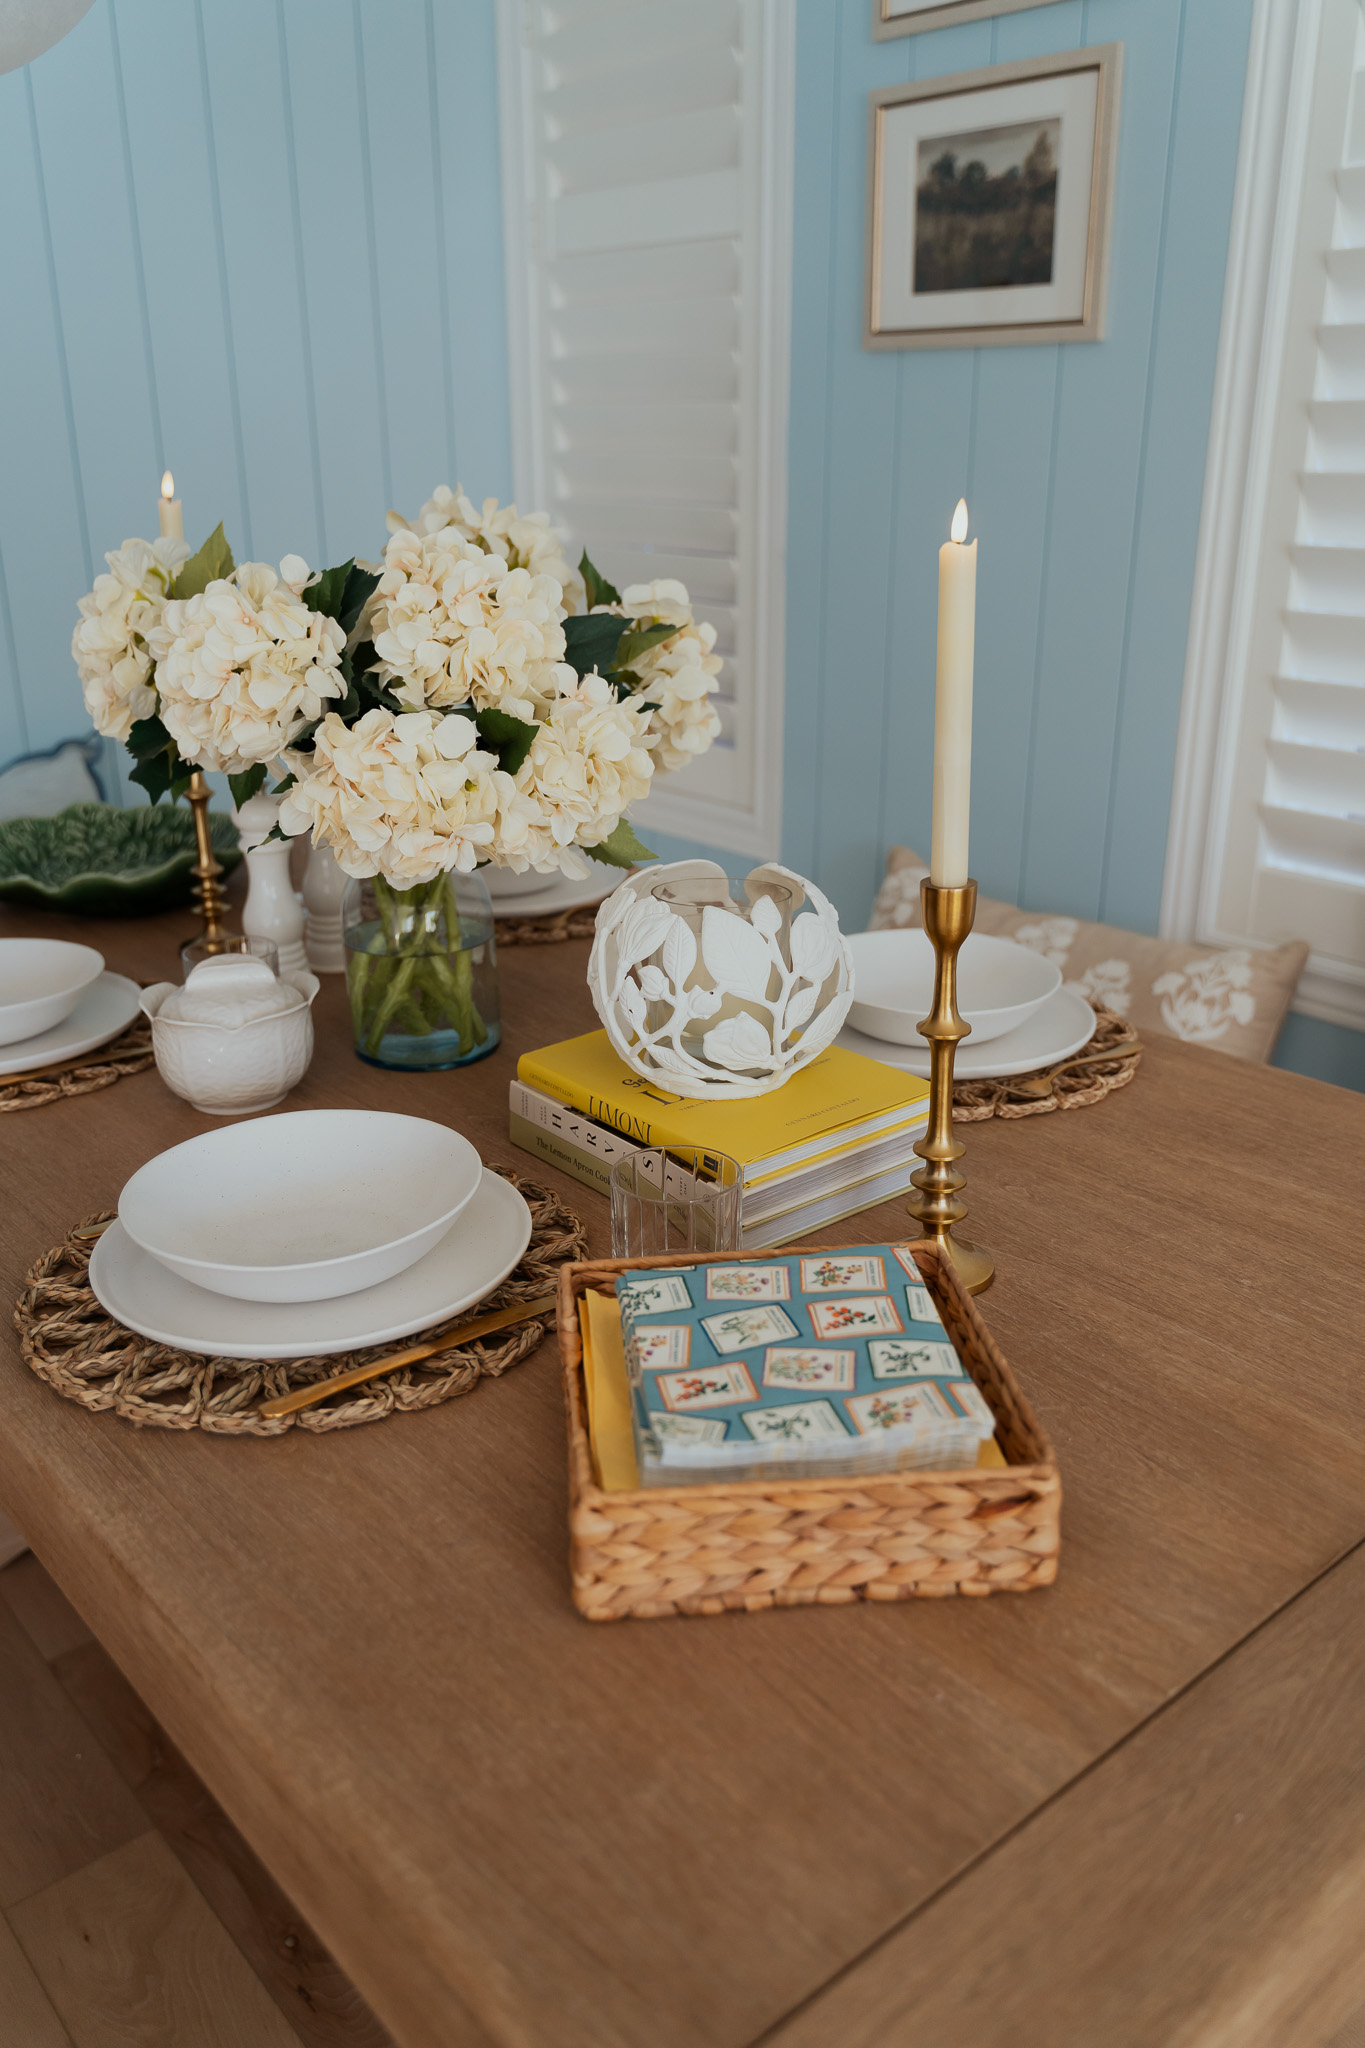
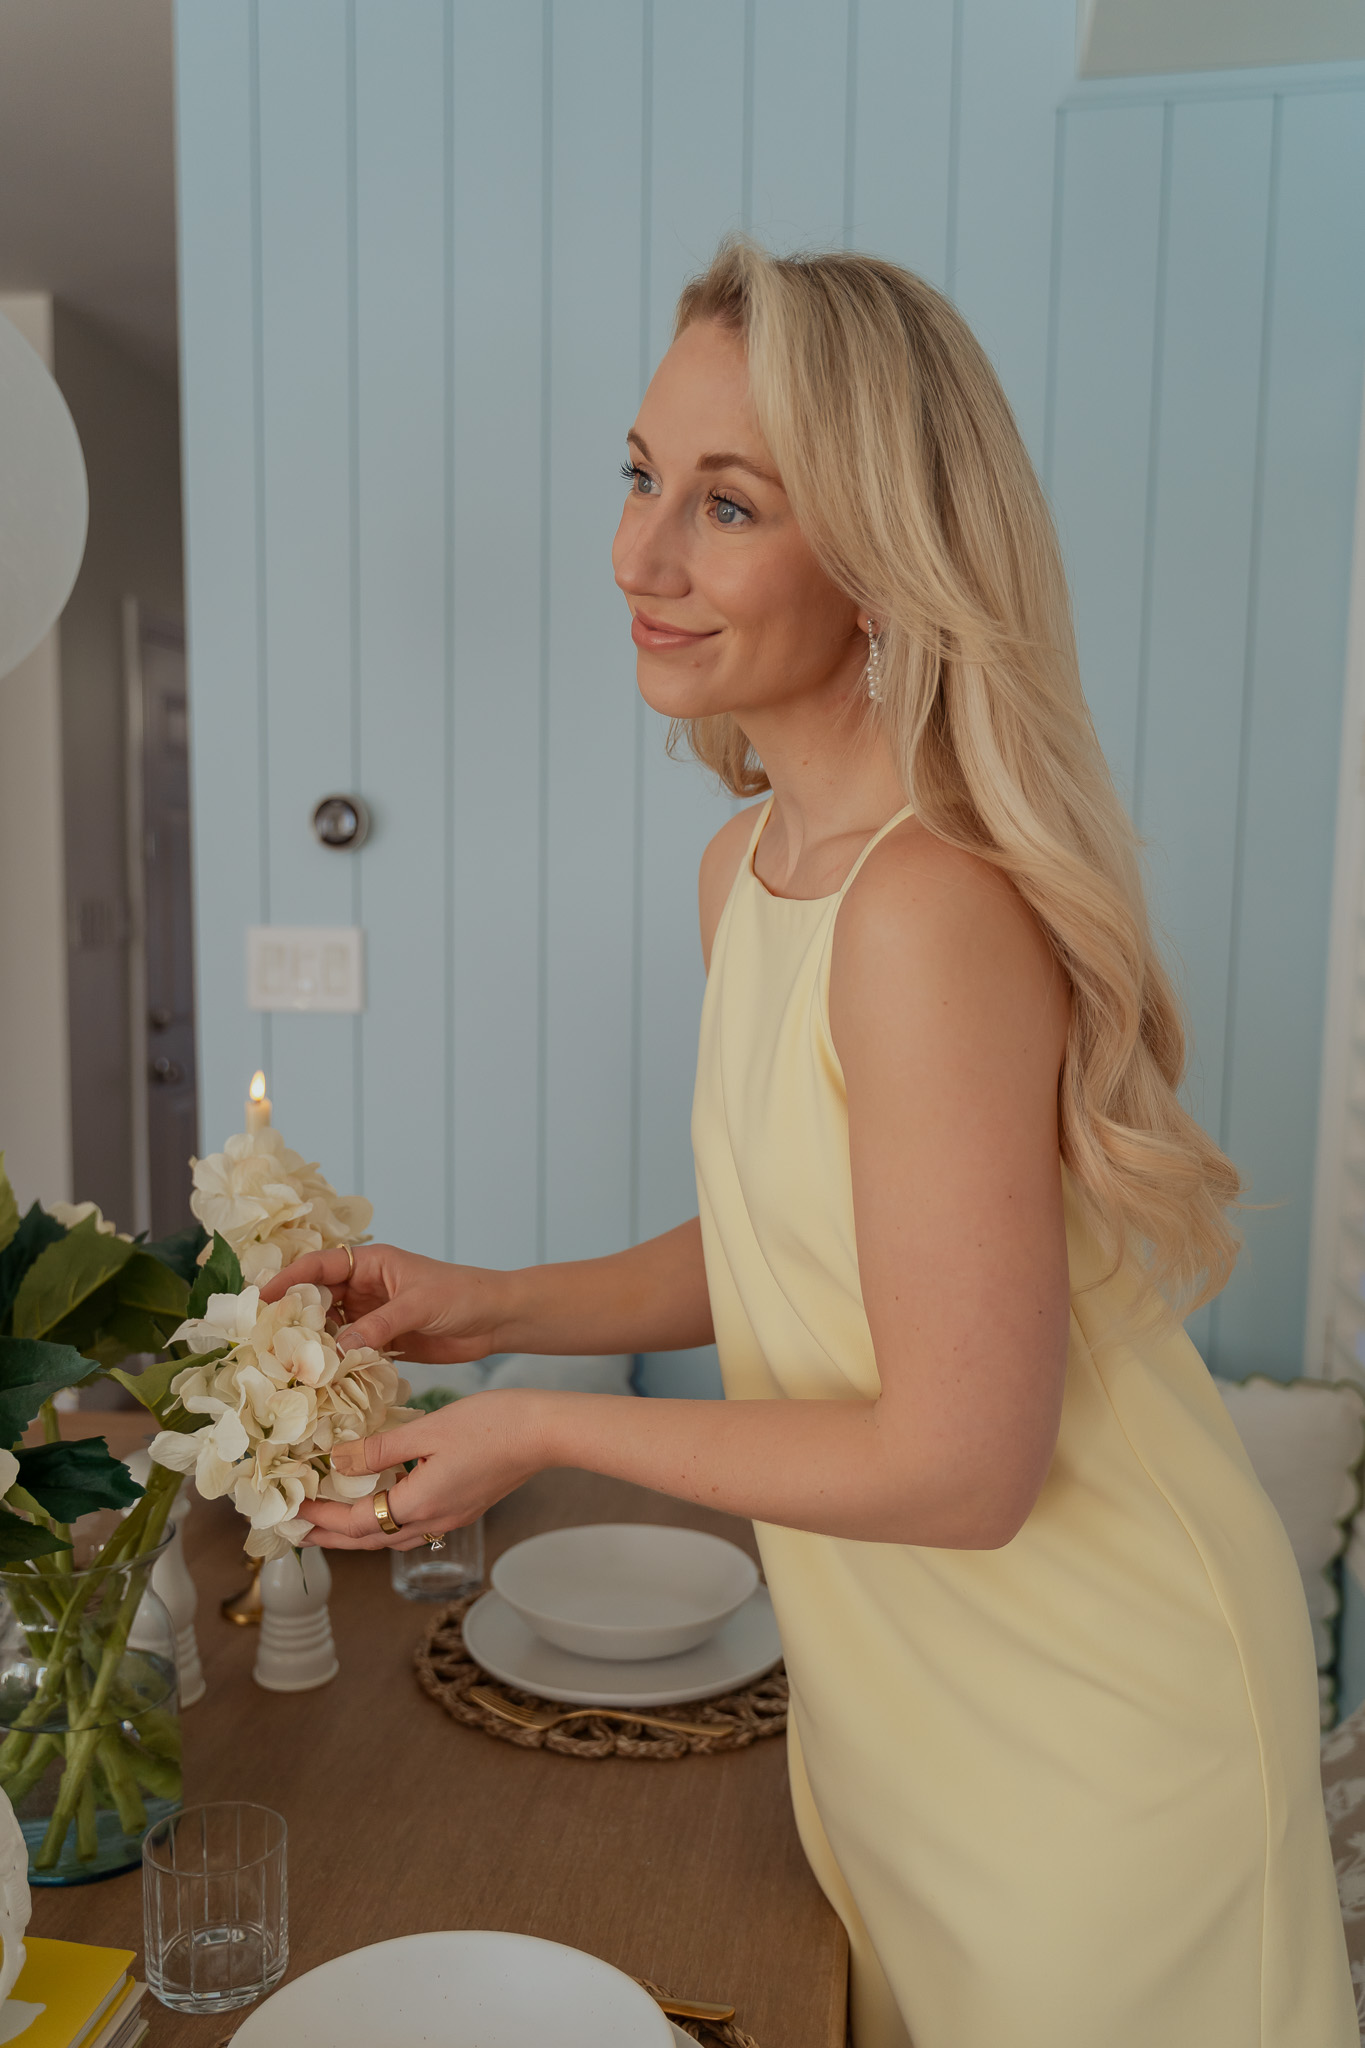
- Finally add those pictures, pillows and other decor to your space to really create a sense of home and belonging. Textiles will always work to soften a space and depending on your prints artwork will add some maturity to what can be considered a joyful blue. I couldn’t be more thrilled!

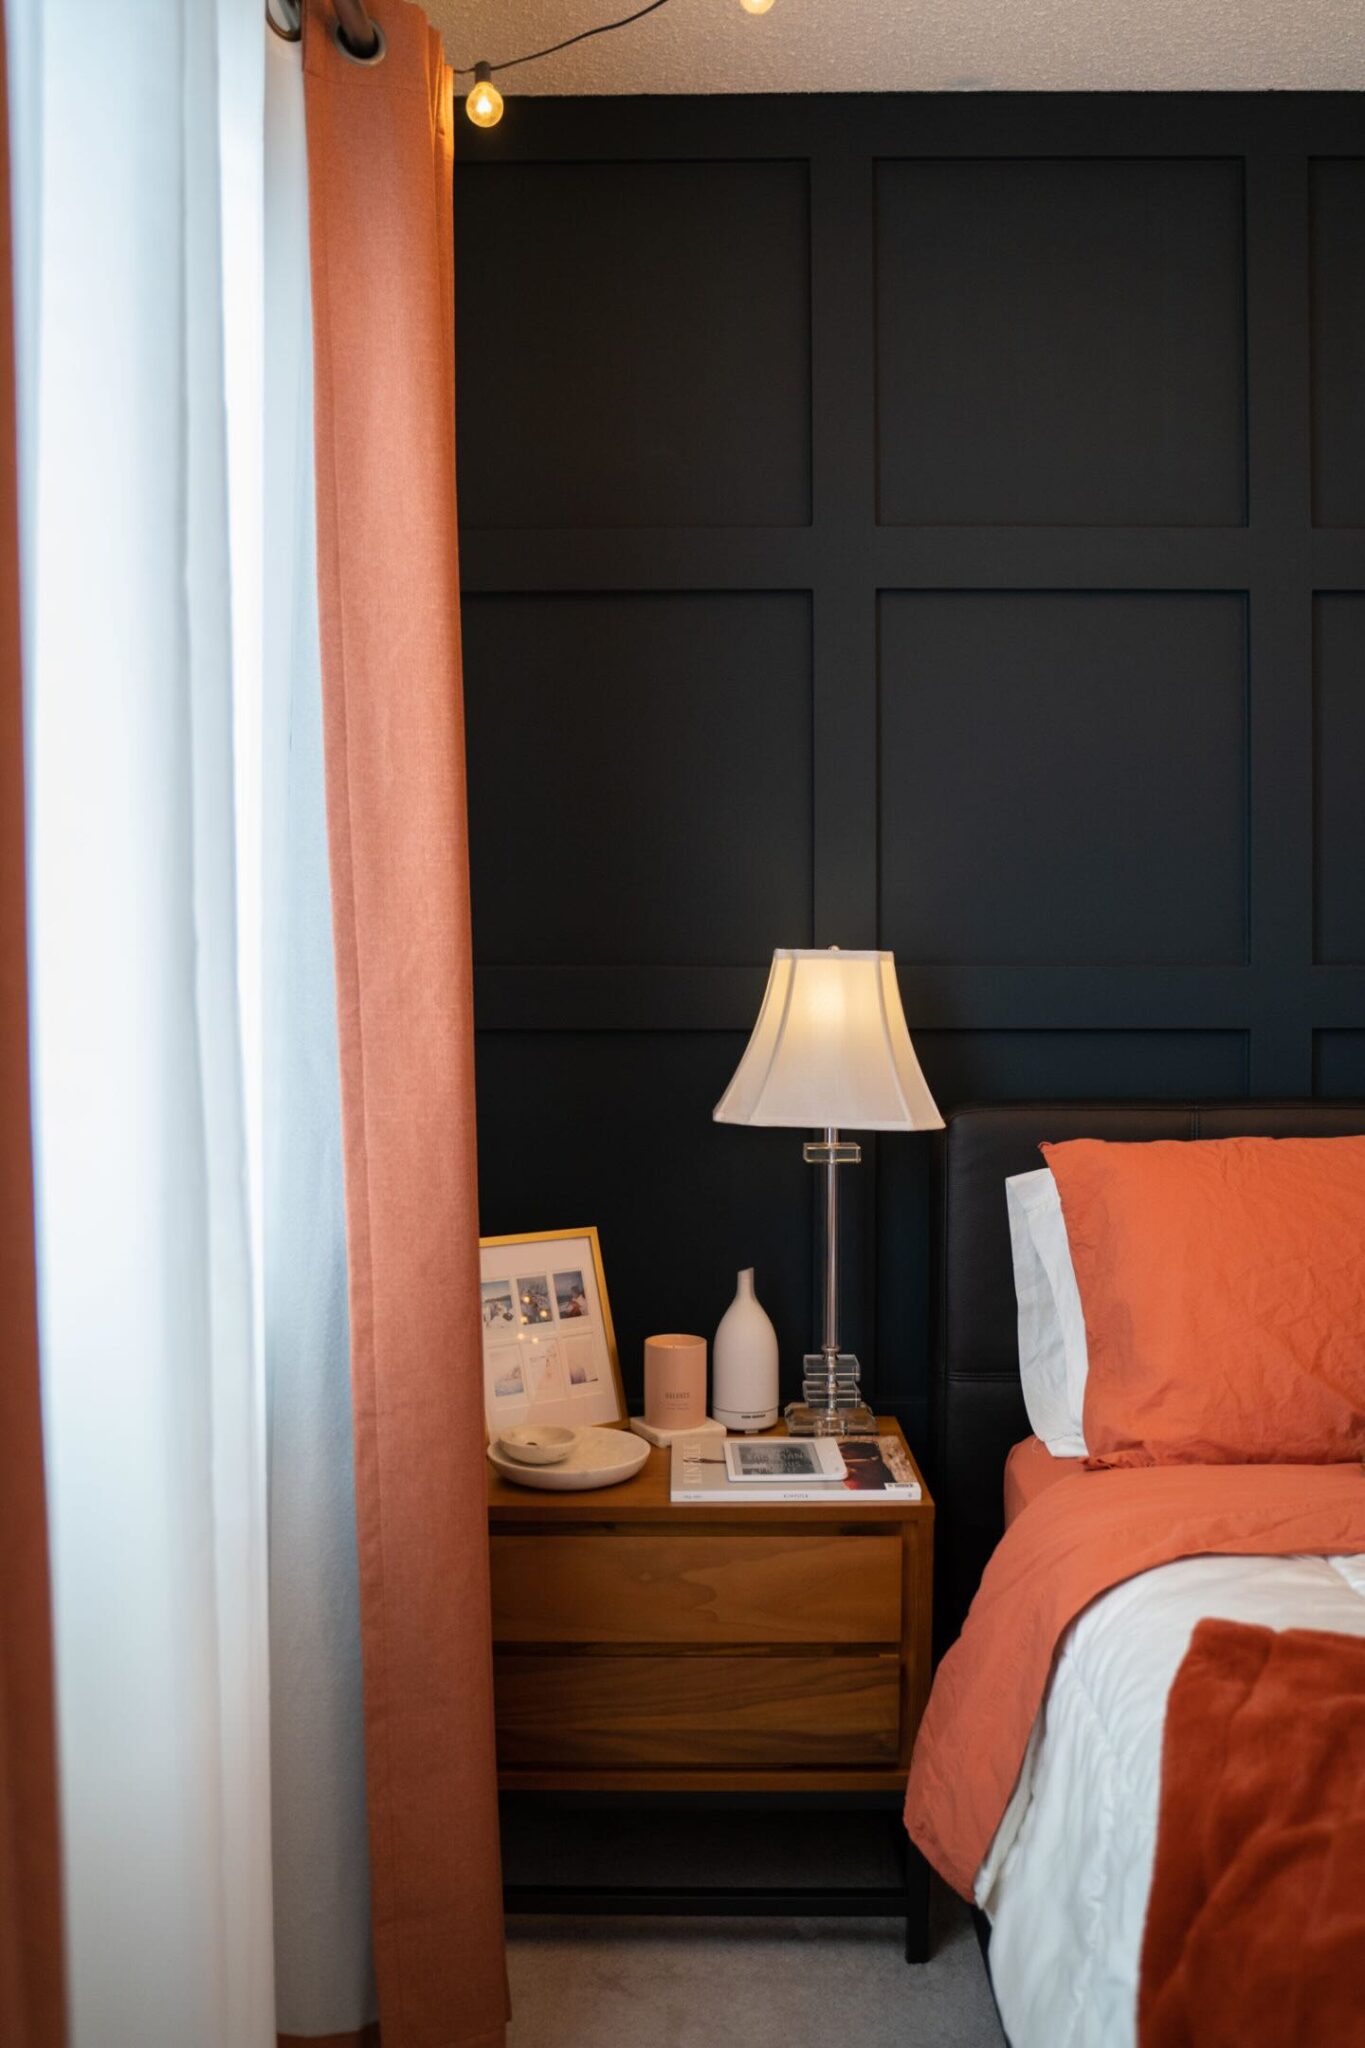
SHOP LINKS HERE // 1. Cabbage Leaf Bowl, 2. Salt & Pepper Grinders, 3. Our Dishes, 4. Rattan Placemats, 5. Flameless Taper Candles (My Fav! We have these in our bedroom too!), Candle Stick Holders (On the table from HomeSense and the ones we have in our bedroom are linked here from Amazon), Hydrangea Stems, 8. Rattan Napkin Holder (The napkins are from HomeSense)

SHOP TOP PILLOW COLLECTION SELECTIONS // PILLOW 1, PILLOW 2, PILLOW 3, PILLOW 4, PILLOW 5, PILLOW 6, PILLOW 7 (These are the ones I bought), PILLOW 8


Challenges & Solutions
The biggest challenge was ensuring the shiplap was aligned despite our walls not being perfectly straight. Honestly what a pain – but once you have it settled you will be happy you took the time to level your boards and straighten the wall. Starting from the second board and making adjustments as we went allowed us to achieve a flawless finish without the frustration!
My second speed bump involves colour. Originally, I was going to choose a much lighter paint colour to play it safe. However, sometimes you just have to venture a little off the beaten path to achieve that “Wow!” result. I have no regrets about embracing bolder mid toned blue in our space. It’s not only bright and happy but also makes a statement. One thing I’ve never understood is designing a house just to sell it—unless you’re actually on the brink of selling, of course (which I’ve been there and sympathize). If you have the time design your home for YOU! Forget the rules. Experiment, make mistakes, redo it, and just have fun with the process!
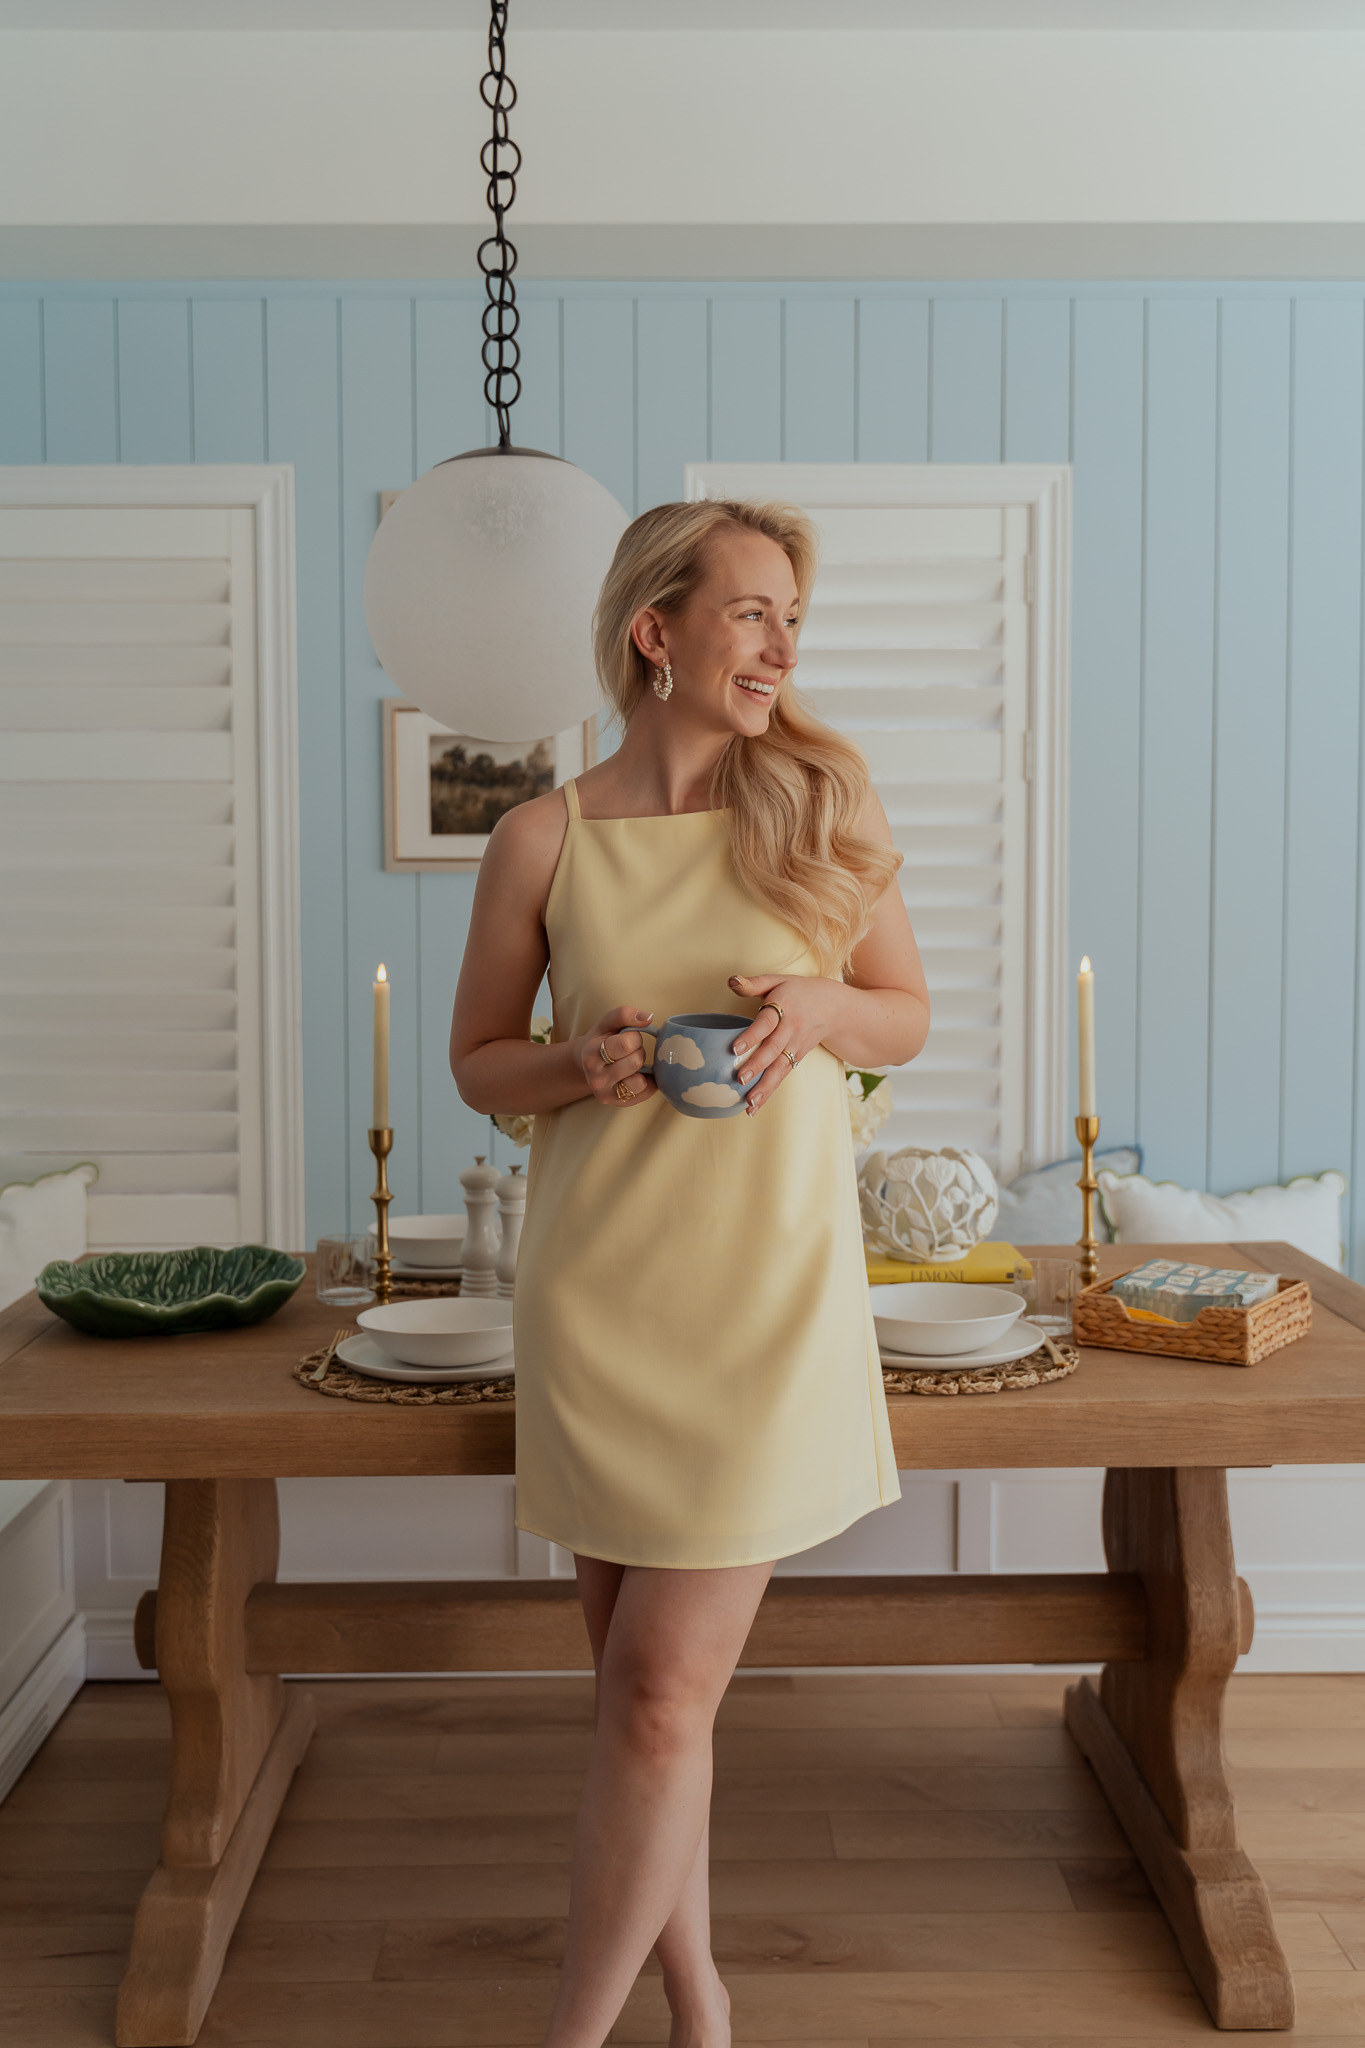
Final Touches & Styling
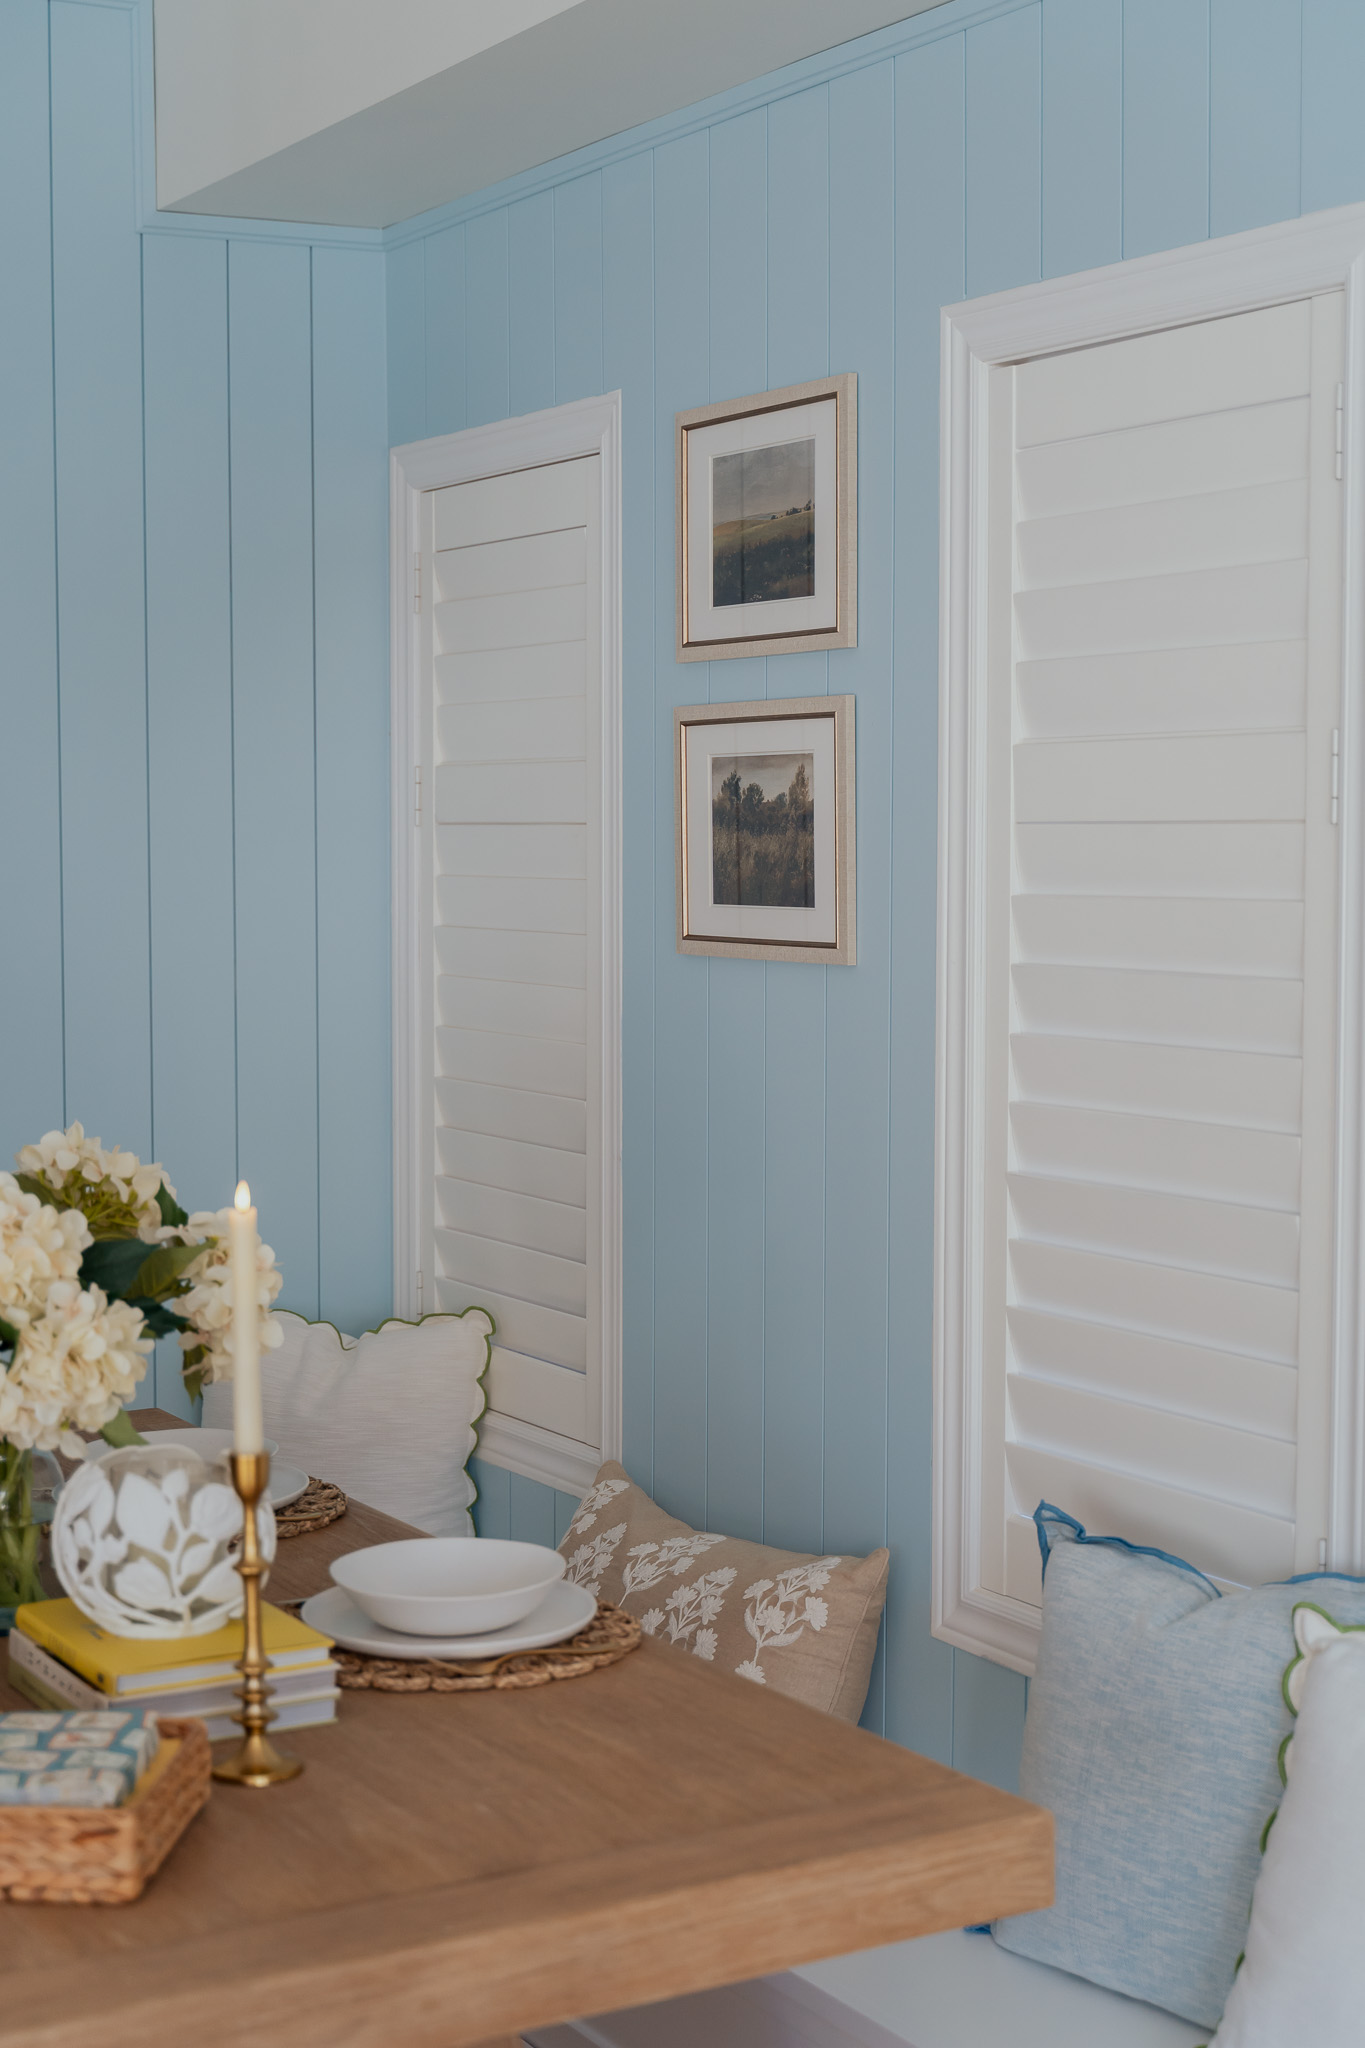
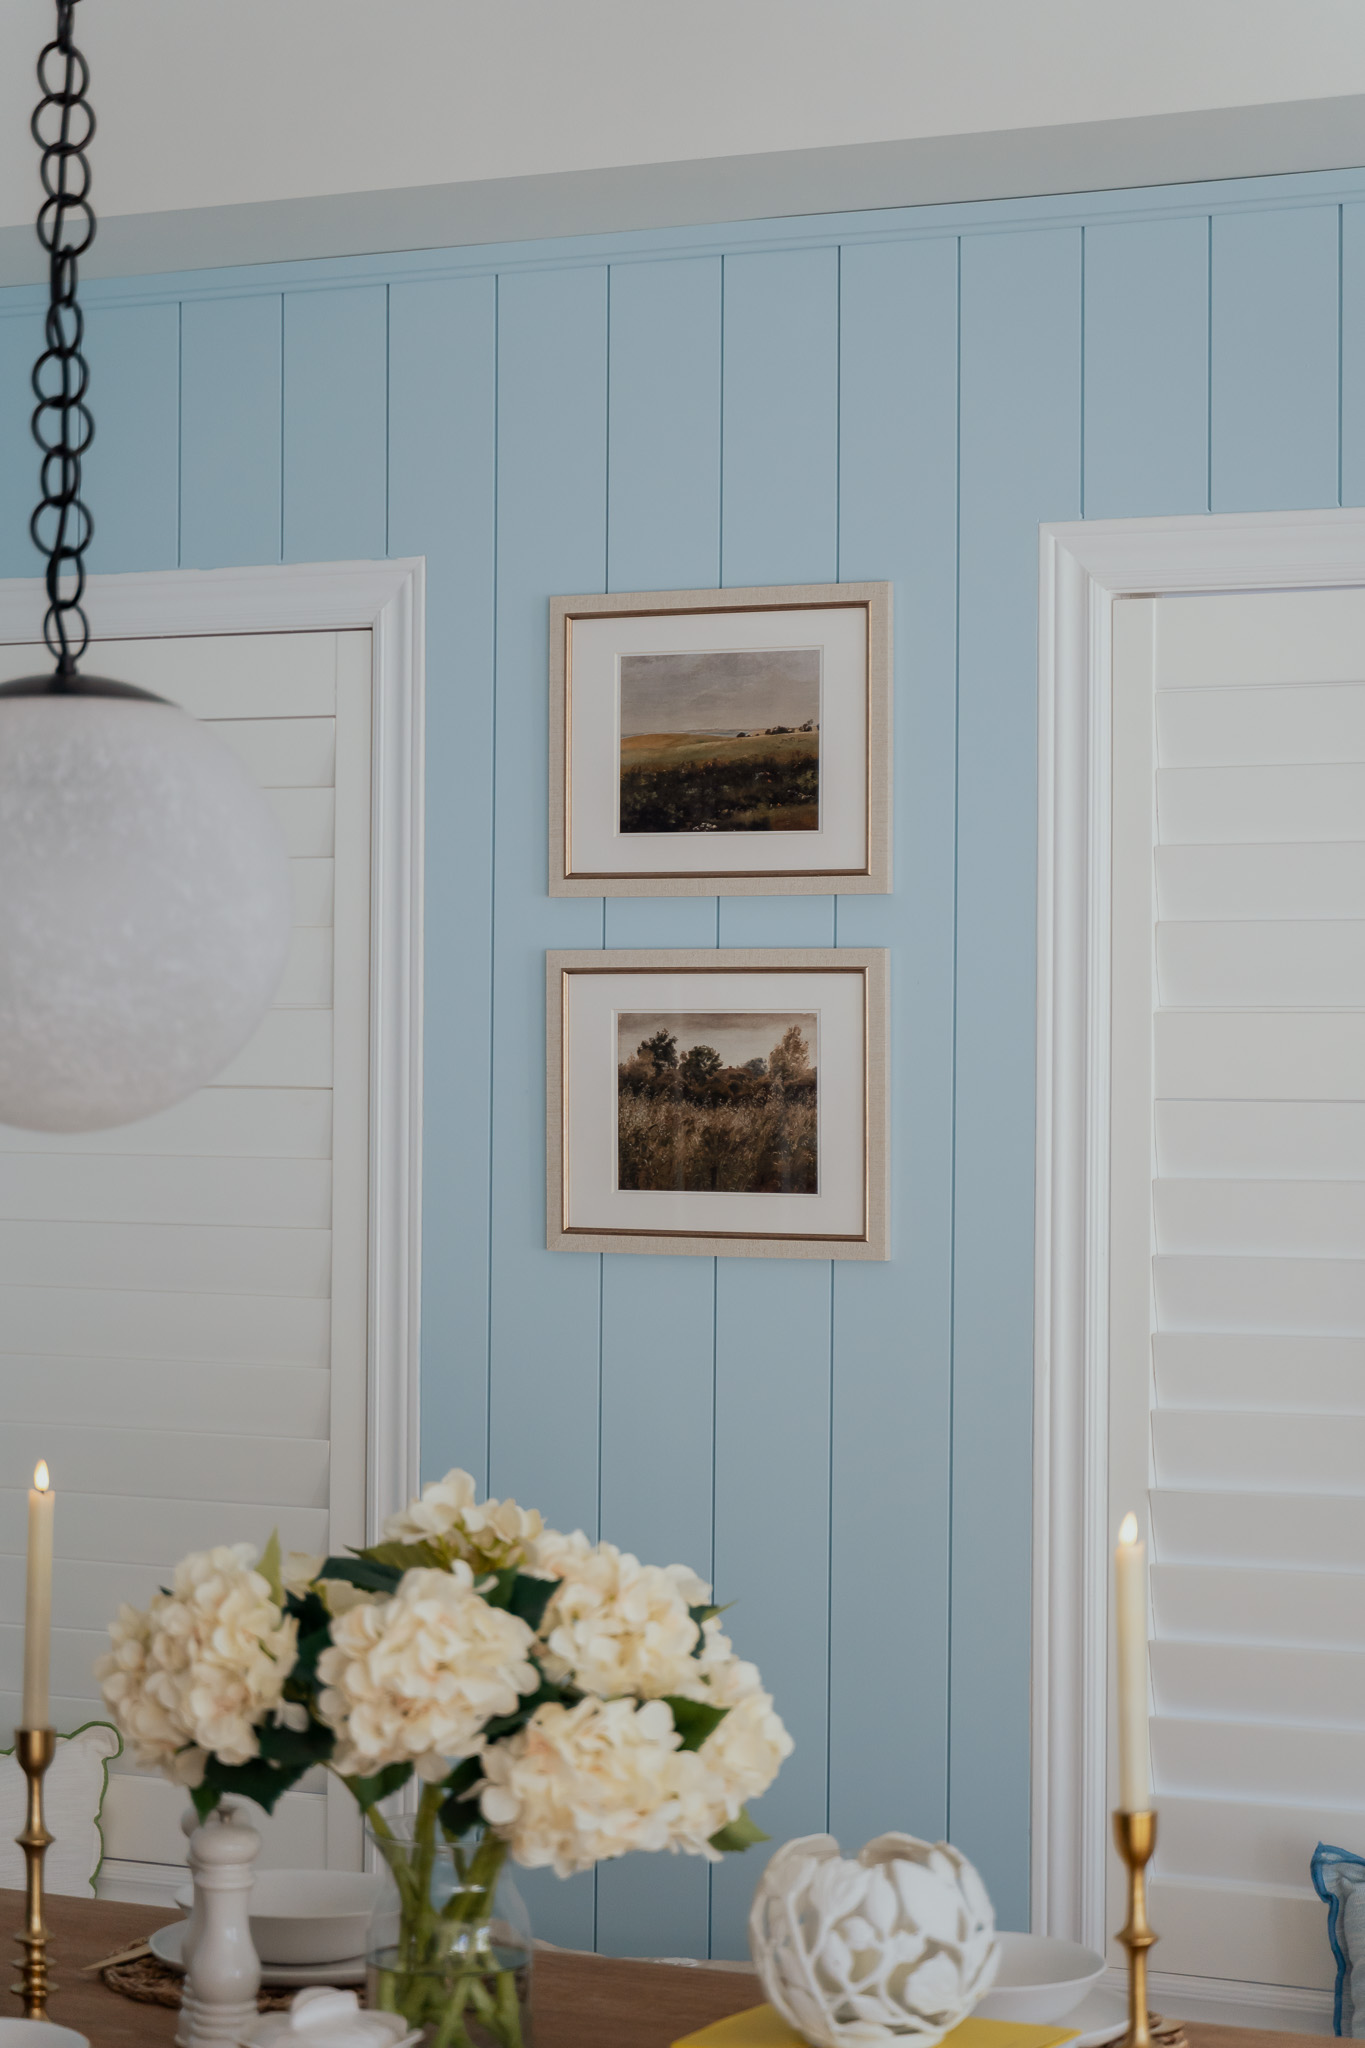
Styling the nook was the cherry on top. Framed prints from Etsy, charming pillows, and a table set with treasured items brought the entire look together. It’s this layer of personal touches that truly makes the space feel like ours.
These are the prints (I purchased the rights to them) from Etsy, printed at Staples and framed at HomeSense – Click on the image to shop!


Personal Reflections & Home Impact
This DIY project has been more than just a home improvement—it’s been a journey of self-discovery and empowerment. Seeing my vision come to life has been incredibly fulfilling, not just for me but for my partner Scotty as well. Transforming spaces that we spend the most time in has slowly begun to turn our house into a home where we dream, celebrate, and create memories!


Conclusion
Every home deserves to be a reflection of those who live in it. My hope is that sharing this project inspires you to take on your own DIY challenge, to create a space that truly feels like home. Whether you’re a seasoned DIYer or a novice looking to make your mark, remember that every brush stroke, every nail driven, and every piece laid down is a step towards making your space your own.
Hey PS. Thanks so much for reading and being here and supporting my business. Most of the links embedded in this post are affiliate links which means when you click on them I might make a small commission at no extra cost to you! It helps me to keep build this little dream of a life. It’s an honour to share our home with you every step of the way.
Much Love,
Amanda xo
MORE FROM HOME


where to next?
OLDER POSTS
NEWER POSTS